Learn how to complete a DIY interior door makeover using this easy step-by-step guide. Small touches like changing hardware, adding paint, and adding trim make a world of a difference in your home. Come see how I do it!

This post may contain affiliate links. Please read our disclosure policy.
If you’ve seen the recent post of mini Small Bathroom Makeover, you’ll know we’ve completed our bathroom. The best part? We DIY’ed all of it!
One portion of that included laying floor tiles and also this DIY interior door makeover.
Making an old door look new may seem like a stretch. Trust me, though. It’s worth it.
It just makes sense to repair something instead of jumping into buying something new.
Turning something old and beaten up, like a bathroom door, and putting some TLC into it can save quite a deal of money when it comes to renovations. Every penny counts.
Let’s jump in, so you can see exactly how I went about this DIY interior door makeover.
DIY Interior Door Makeover
Supplies & Tools
Sandpaper
Paint
Moulding (we used this)
Measuring tape
Miter saw
Yardsticks
Drill
Rubber mallet
Spackling paste
Door knob
Hinges
Carpenter square, optional
Adhesive (JB Welding is the best stuff ever!)

Steps | DIY Interior Door Makeover
Remove the door, make measurements, and gather supplies.
I had my husband take the door off the hinges for me and make measurements of the entire door, the hinges, and the door knob.
This is essential because all hinges and doorknobs don’t come in the same shapes, styles, and sizes. Be sure to get the right fit for your door.
Our door measured 24×80”, which is pretty typical for a door. I wanted to create elegant rectangles to frame the door with on both sides. With this in mind, I was able to estimate roughly how much moulding I would need.
Trim comes in 8 or 12 feet pieces typically, so keep this in mind when calculating how many pieces you’ll need to buy. I think we bought about 6 8-ft pieces that easily worked. We even had some leftover after adhering it to both sides.
Sand the door.
Sanding the door is necessary because it’ll help the paint stick better. Additionally, it helps get any grime that may be layered on from over the years.
If you know anything about our experience with our old home, you’ve probably already heard me complain about the previous owners and their lack of keeping up with repairs over the years. Cleaning was also not the previous owners’ forte, that’s for sure.
Measure and cut the mouldings.
For the initial cuts, we needed 4 16-inch moulding pieces to run horizontally, 2 37-inch pieces to run vertically, and 2 26-inch pieces to run vertically also.
Door knobs are placed slightly closer toward the bottom of the door (versus smack dab in the middle. This is how I knew the bottom moulding frame would be less tall. That’s also why the horizontal pieces of moulding will all be the same size but there are two different sizes for the vertical ones.
Pre-arrange mouldings where you’d like them installed.
Place each of the frame pieces 4 inches off from each edge they ran parallel or perpendicular to. Then, make sure the moulding near the center of the door is 4 inches away from the doorknob. I did this because I was afraid I would get the frame sizing right, but then have the placement of the frames in relation to the door way off.
Since I wanted everything to look very sleek and professional, I really took the extra time to get everything just right. Be sure to lay out exactly how you want it to look when finished. You can mark outside or inside the corners with a pencil to line everything up correctly. This may make it easier to lay later once diagonal cuts have been made.
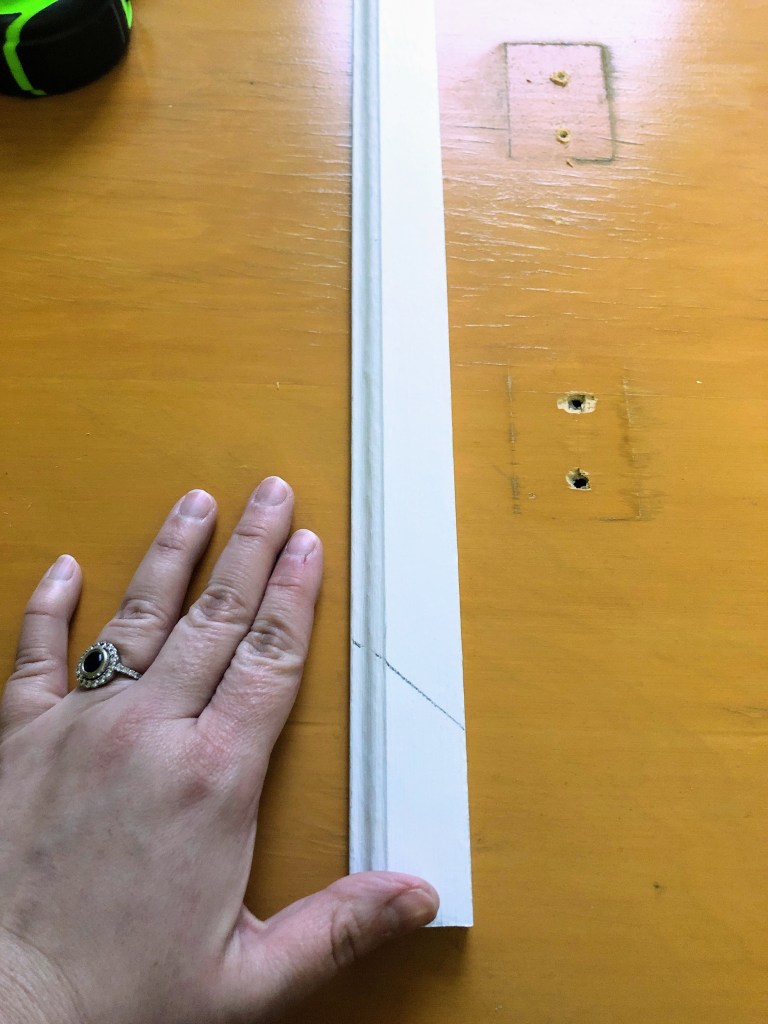
Mark where diagonal cuts will be made.
Now you’ll need to make diagonal cuts for fitting corners together, to create the rectangular frames on the door. Just be sure to keep the lengths of the moulding pieces exact.
Use a ruler to mark on the mouldings where you’d like the diagonal cuts to be. After the initial cuts were made, I made marks where I knew pieces of the moulding would be joining, at corners, so they would fit together correctly without being uneven.
The only trouble with this is you really have to keep these all separated because if you mix them all up when cutting you’ll have to sort through all of them again to find the right one that fits each specific corner perfectly. Or you can just make cuts and if anything doesn’t line up perfectly you can leave small gaps where needed and fill them in with spackle later. You just don’t want slanted and crooked framing on your doors. Approach with caution.

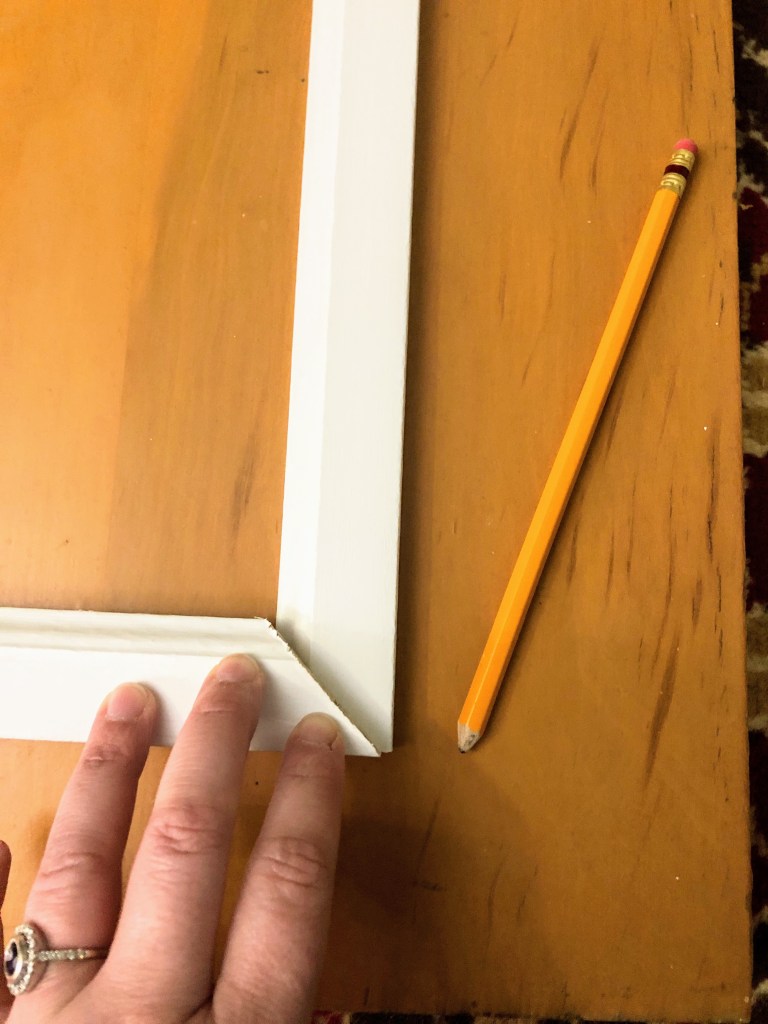
Use adhesive to glue the moulding frames together.
Make sure the door is laying flat. Line up the mouldings again, making the same rectangular frames you previously made before making all necessary cuts. Really step back and survey everything to make sure it’s straight.
Use yardsticks, setting them up parallel to one another, to help you. This ensures your two stacked frames are aligned with one another properly.
Use the adhesive quickly, as it begins drying within ten minutes. Spread the adhesive onto the moulding and firmly lay it in place, readjusting as you go. You may need to make adjustments as you’re fitting new pieces along the existing pieces of moulding. Especially at the corners. They may slip around a bit until they dry more, so be careful.
Since I wanted my doors to have two rectangular frames on each side, I could only do one side of the door at a time. Let the glue dry and cure for an hour before turning and gluing the other side.
However, if you’re doing a closet door I wouldn’t bother doing both sides. Only the outside portion that people will see. No point in going through all the trouble of making something pretty if no one can see it.
Be certain it is really stuck on before attempting to turn it over.


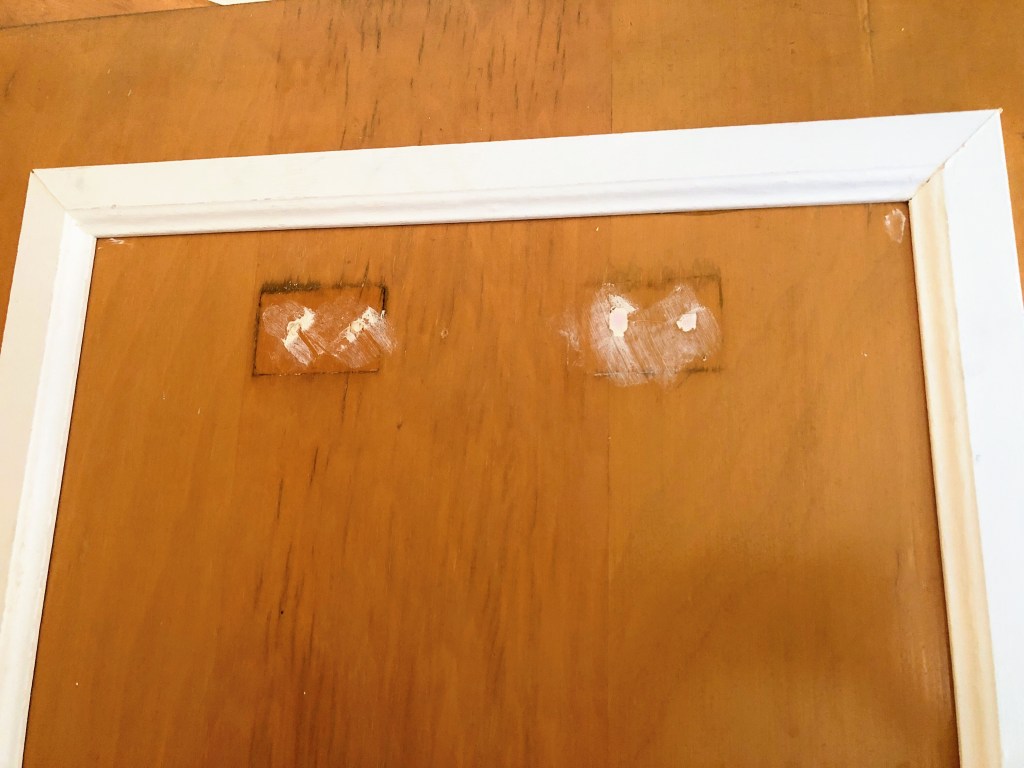
Spackle any dents or holes in the door.
After applying spackle, let it dry for a couple hours (or until dry) and sand it down smooth.
After painting, it should be undetectable to the human eye. This stuff is a lifesaver and can work wonders when used properly.
Paint the door.
If you’re painting it white, plan on painting at least two coats. If the old door was white, you may be able to get away with one, but otherwise you will need two or more to cover everything up.

Install the “new” door with new hardware.
Now with the help of someone else you can re-install the door. Start with the hinges (starting with the top, bottom, then middle–in that order for efficiency), and then get the doorknob placed inside it. You may need a rubber mallet to get the hinges to fit in tightly.

Clean or touch up any areas that got ruined during installation.
If you’re anything like my husband, you’ll end up with some dirty spots when changing out the door knob and hinges. It’s kind of inevitable. Luckily, this can easily be wiped down or even touched up with paint if needed. If anything gets dinged up, just apply a bit more spackle.
Now your door is complete and ready to be admired.
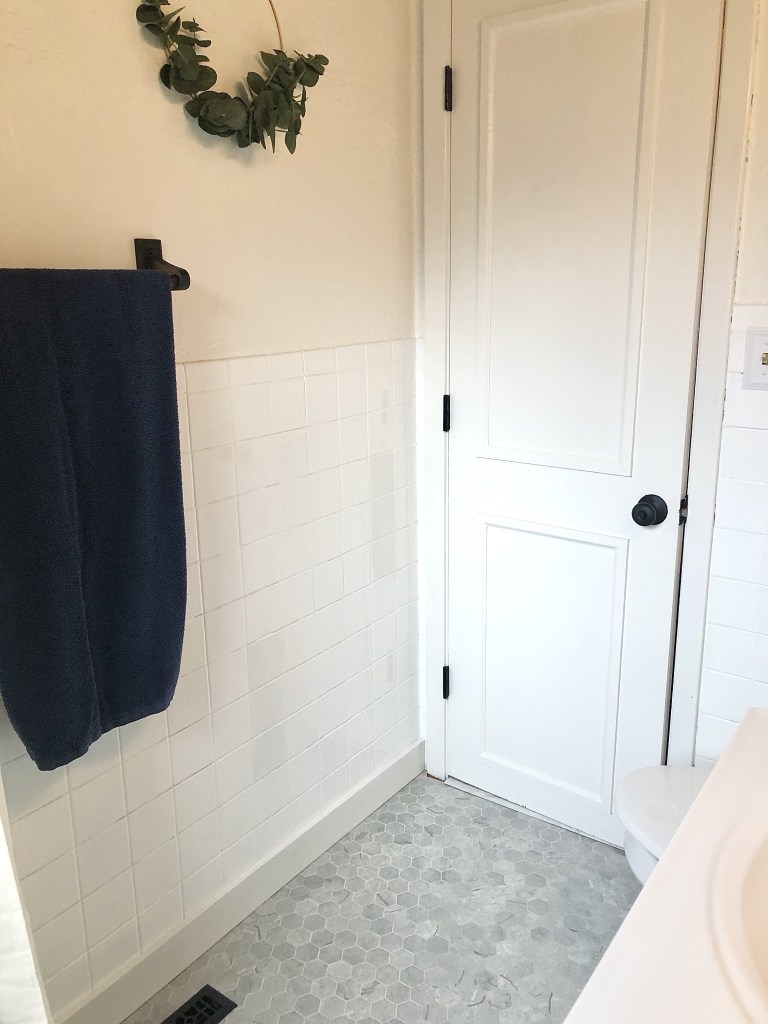
Final thoughts…
I may sound crazy, but having this door spruced up, particularly with the framing, makes the bathroom stand out so much more. It looks more authentic and has much more character than doors you’d be purchasing at a hardware store.
We have actually madeover a total of 6 doors like this in our home. It has taken persistence, but we are so happy with the results.
I can’t lie—I also love that we spent half as much as if we’d bought new ones with a similar design! Highly recommend this DIY interior door project to anyone interested in adding some sophistication to their home.
More DIY Project Inspiration
How to Refinish Wood Furniture the Right Way
DIY Dresser Makeover | Marble Top with Tiles

14 thoughts on “DIY Interior Door Makeover”