Learn how to make a timeless gallery wall in any hallway, bedroom, or other living space with these simple steps. From wall to wall, this space has been transformed into a photo-filled collection of our favorite memories. These gallery wall ideas are perfect for any traditional interior or modern home. This black and white gallery wall even looks perfect in our cottage style house.

This post may contain affiliate links. Please read our disclosure policy.
I debated back and forth on whether I wanted to add a gallery wall into our hallway. Weren’t they too modern or just too busy? I am not exactly a minimalist because I love decorating. But I was also worried the wall would look too eccentric or cluttered.
However, I found a way to create a stunning gallery wall that fills one side of our hallway. It looks classic and can be combined into a number of different home interior styles.
What is a black and white gallery wall?
A black and white gallery wall is classic and timeless. It refers to an arrangement of many pieces of art or photography on a wall. You can even add in more practical items or obscure pieces that are part of a collection.
I personally think gallery walls are classy without being too over the top. They’re a simple way of making a statement on a wall. And it’s easy to create a basic gallery wall arrangement that draws attention to the eye without oversaturating an entire wall or space.
A gallery wall can be simple with just a handful of photos or art, or you can use numerous different shapes and sizes for frames. I personally love a more vintage-style arrangement. Really, though, they’re versatile and you get to decide how simple or extravagant you want yours to be.
In a nutshell, I added prints from our wedding day to some basic black frames. Then, I found a vintage style gallery wall template online. I put my own spin on it and eyeballed the entire thing, without measuring, to space the frames. No nails were even used to keep the frames in place on the wall. I actually took a much lazier approach.
So, let’s get into the details of creating a black and white gallery wall…
Supplies | black and white gallery wall
Tape (clear or painter’s tape works)
Scissors
Black picture frames, with or without mats
Black and white photos or art prints
How to Make a Black and White Gallery Wall
Prep wall space

My husband and I had just painted our hallway the week before I created this gallery wall. Luckily, I had all the blank space to work with. If you don’t, you’ll need to clear everything off the wall first.
Be sure to leave yourself plenty of room for your entire gallery wall. For example, I knew I’d have about 7-8 photos of varying sizes on the wall. I used a space of about 6 feet by 4 feet for my 8 multi-sized photographs. Better to have too much space than too little.
I knew that other than this gallery wall, there would only be a single, small piece of vintage art in the entire hallway. There was plenty of room to work with. (I go into the entire hallway refresh in more detail in my post Simple Hallway Ideas, where I show the entire hallway space.)
Order prints

I find it easier to get prints of photos that can easily be resized (or even trimmed later on) to fit certain frames than to shop for frames of certain photo sizes. I ordered these black frames that came with mats. The frames came in 3 different rectangular sizes. Then, I ordered one circular 6×6 frame to add a little diversity into the mix. I knew I wanted at least one frame that was a little different.
After selecting these sizes, I went onto Mpix.com and added black and white filters to all of my photos. Next, I changed the sizes on them to fit the picture frames.
Make alterations
If you have some photos where the mat covers part of the image that you want to show, discard the mat from the frame and save it for another project. I ended up keeping 5 mats in their frames and the other 3 ended up with just the frame and photo. This variety looks really nice on a black and white gallery wall.
A few photos were too small for the frames I had purchased. However, going in, I knew they would fit perfectly inside the mats. I simply taped them to the mats to make sure they didn’t fall out of place. Problem solved.
Additionally, trim any edges that don’t fit in the frame. I had to do this for my circular frame, but the rest fit into their frames just right.
Find a layout you love

I did a quick search online for gallery wall layouts and stumbled upon several templates. My favorite was titled “vintage style.” This one was perfect for me because it had one round photo in the mix just like mine. The sizing was a bit different on the photos, but this was a great guide for me when I went to lay out my inserts.
Now that you have an idea of what you want your arrangement to look like, it’ll be much easier to start playing around and trying different frames in different spots. I recommend starting on one side and working toward the other, following your layout guide. You can always switch frames out with each other if you don’t like exactly how your arrangement looks.
Use frame inserts as templates
Now you can easily grab the inserts that came with your photo frames, and use these to arrange a template on your gallery wall. These are so easy to use and move around as you change your mind about the layout.

Keep in mind that these inserts are the size of the photos and not the frames themselves, so space them apart a tad bit further. My frames had about a ½ inch width, so I accounted for that when spacing the inserts. This will still give you an almost precise idea about your layout.
Most frames come with inserts, but if they don’t you can always measure out your own templates. Use any paper you have on hand to accomplish this, tracing the frame on it. Plain brown wrapping paper works well.
I personally prefer a bit more “white space” on my walls–empty space that allows a bit of breathing room. So my photos are more spaced than most gallery walls I’ve seen. This is how I prefer it, too, but you’re welcome to do what you want on your project.
Without measuring anything, I eyeballed how much I wanted the frames spaced. I didn’t use a leveler like I’ve seen some other bloggers mention either. If you aren’t comfortable with that, you can always use one. I just prefer being efficient and have been decorating long enough to trust my eye. It also just depends how exact you want to be.
You will need to take a few steps back every so often to see how it looks from afar. Just to survey the entire gallery wall and make sure you’re staying in line with everything.
Secure Command Strips
I know a lot of people will want to use nails because they’re sturdier, or they don’t want to make a run somewhere for a bunch of command strips.
Let me tell you, these are so much easier than nails. I placed a drive-up order at a retail store and quickly picked up a package of these picture frame command strips for around $8. It was enough to hold up all 8 of my picture frames. They actually have velcro on them which is so useful for removing them, if you ever need to. They’re very sturdy, but I did use two strips on some of the larger frames. Still, it was so worth it. Less invasive, overall.

As you’re going about and securing the frames, keep stepping back to double check spacing, placement, etc. to make sure things are level and aligned well in relationship to one another.
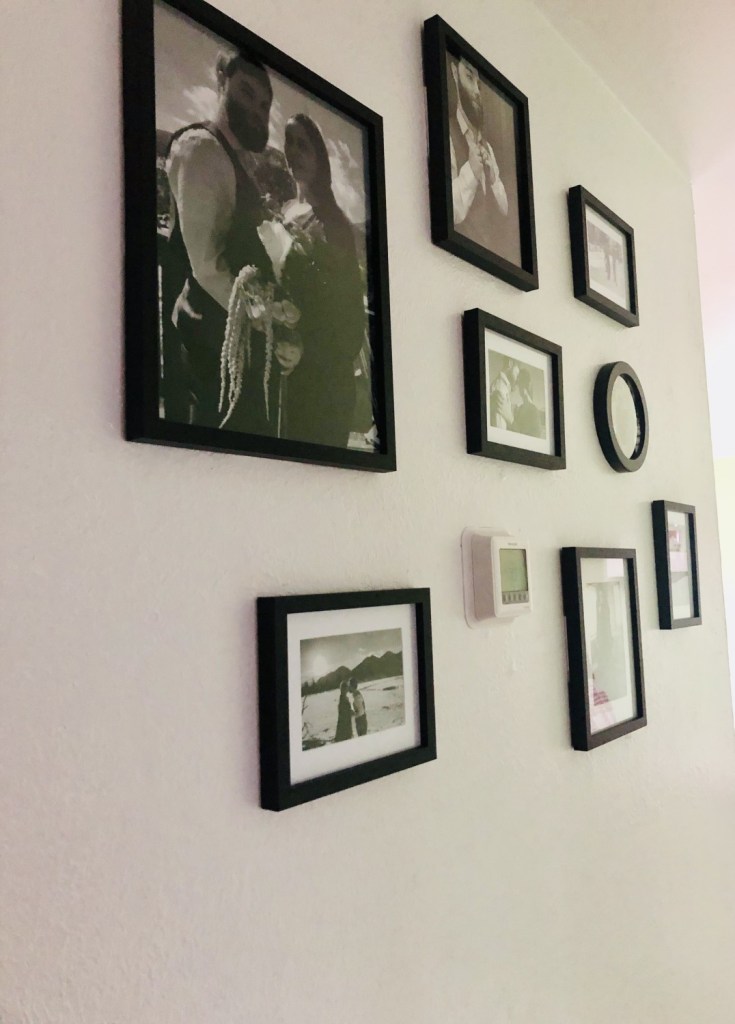
The final product is so beautiful. This is exactly what I envisioned when I decided to tackle this project. It is just bold enough, with the black, sleek frames standing out from a textured, white wall. But it’s also not too outrageous or distracting. It has an old-fashioned look and serves a purpose.
Every time I go down the hall or exit the bathroom, I get to see all these images of our wedding day. I get to briefly relive those memories that come flooding back for a few seconds as I go about my day.
It truly brings me so much joy.

Tips for Success | black and white gallery wall
If you don’t want to stick exactly to a layout you found online, just use one as a guide. I did this and was still able to create a beautiful black and white gallery wall, even though I had absolutely no experience in doing this before. Use your template to guide the positioning, but feel free to play with the spacing and trade some spots out with one another. Vary the frame positions from portrait to landscape on some for a bit of variety, too.
For a black and white gallery wall, I recommend you use a canvas (the wall) that is a neutral color. A shade of white or a light-toned gray or tan is a great background for a black and white gallery wall. Maybe you’re feeling bold and think it’ll work with another pastel, but I can only speak from doing this with a white wall. The white space (empty space) between your art or photography plays a huge role in the final outcome of your gallery wall. Which is why the color of the wall matters so much.
Have fun with it and don’t take it too seriously. I was so excited for this project because I knew it would be an easier project with instant gratification. It didn’t take much time and since I wasn’t nailing things into the wall I felt a little less pressure going into it. Just enjoy the creative process!
More DIY Projects
How to Make an Old Door Look New
Refinish a Bathtub in 3 Easy Steps

7 thoughts on “How to Make a Black and White Gallery Wall”