Learn how to lay hexagonal floor tiles with this easy-to-understand guide. I walk you through all the steps from beginning to end, with a few extra tips thrown in. Your stunning new floors will be done in no time!

This post may contain affiliate links. Please read our disclosure policy.
You may be thinking you have no idea how to lay hexagonal floor tiles–or maybe any floor tiles for that matter. I’ve only laid tile once, recently when updating our bathroom, but I learned so much and knew I had to share all my tips with you.
It’s actually quite easy, as long as you’re strategic and plan well.

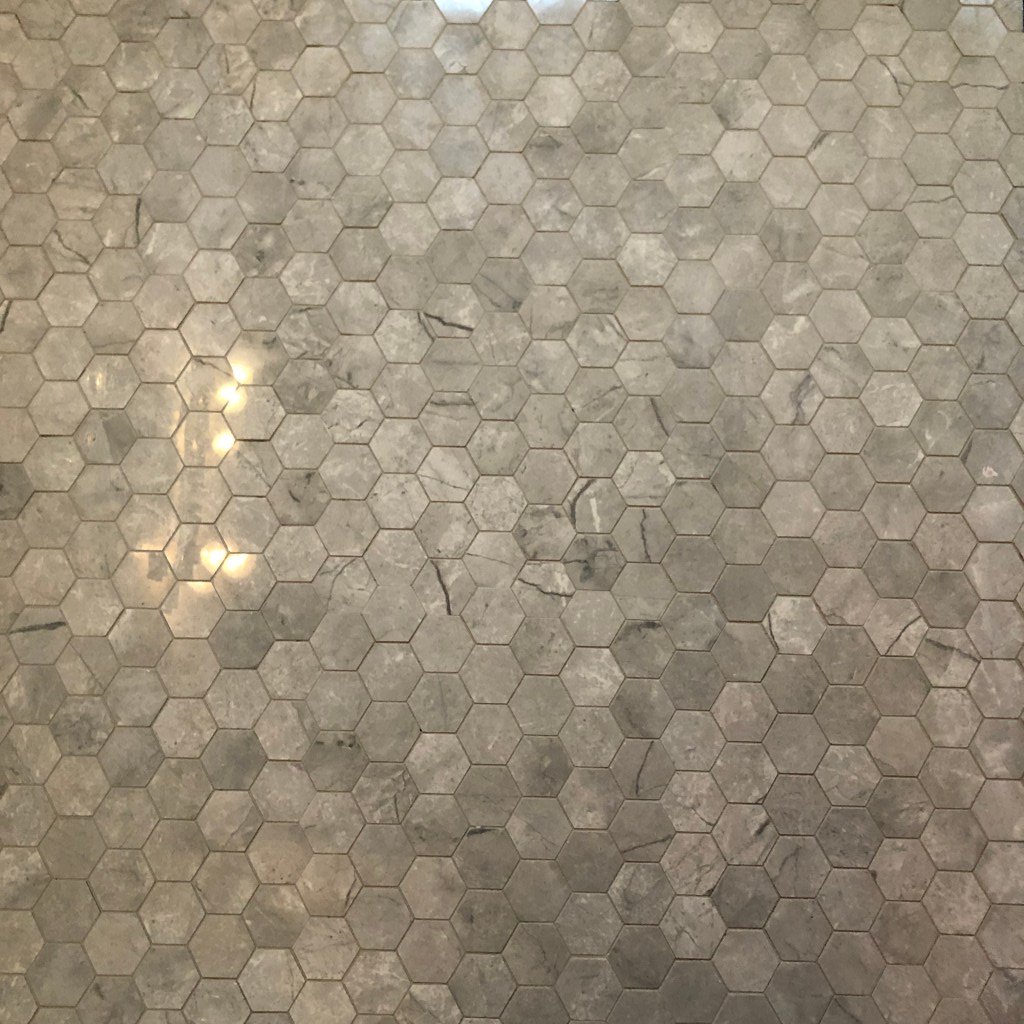
I personally fell in love with these porcelain tiles my husband and I bought from Menard’s. They were a little pricey, but so worth it! They’re very durable at ⅜ inch thick and made from porcelain which is perfect for flooring.
We chose the Argento tiles because they appear like marble and look so timeless and classy.
The hexagonal style has an antique feel to it and sets a more formal tone for our bathroom. We used this warm grey grout to fill the spaces between the tiles, and it looks natural and fabulous.
Let’s jump into exactly how to lay hexagonal floor tiles…
Supplies You Will Need
• Tile sheets
• Mortar
• Grout
• Grout float
• Grout sponge
• 2-3 buckets
• Cement backer boards
• Backer board screws
• Backer board tape
• Plastic spatula
• Tile snapper or wet saw
• Circular saw

How to Lay Hexagonal Floor Tiles
Measure floors and order supplies.
This is essential because you’ll need to know how much tile to purchase. I recommend buying sheets that come in about 1 sq. foot pieces to make it easier to order. Be sure to order a little extra just in case any tile breaks during transport, tile cutting, or installation. You can always return any extra later. It’s important to get as many supplies beforehand, so you aren’t scrambling at the last minute for supplies or having to stop or postpone your tiling because of running out of something.
Remove everything.
The toilet, the sink or vanity, floor registers (vents), basically everything that will get in the way needs to be removed from the floors. It’s easier to lay these things over a newly tiled floor than it is to tile around them, especially the hole in the floor for the toilet.

Prep the subfloor.
This is probably the most important step. Without a proper subfloor, your tile can end up looking really bad. It could turn out uneven–or worse, your floor goes unprotected from water and moisture in the bathroom. This could result in mold, rotting wood, and a host of other issues after you’ve completed a beautiful floor.
We chose to use a cement backer board that’s about ¼ inch thick and is water resistant. We had to cut it to fit the room and then drill screws through it to attach it to the wood floors beneath. Then we used moisture-resistant board tape to seal the seams and edges.

Side note: The backer board is cheap and effective, but such a pain to cut. Be prepared to have a saw to cut this if you go this route because the specs on ours said you could score and snap. That was quite the joke. If I had to do this again, I’d definitely go the expensive route and just pay for the roll out plastic version of the backer board, which unrolls like a yoga mat. It’s flexible, light and easier to cut. It’s so much easier and quicker to work with from what I’ve seen.
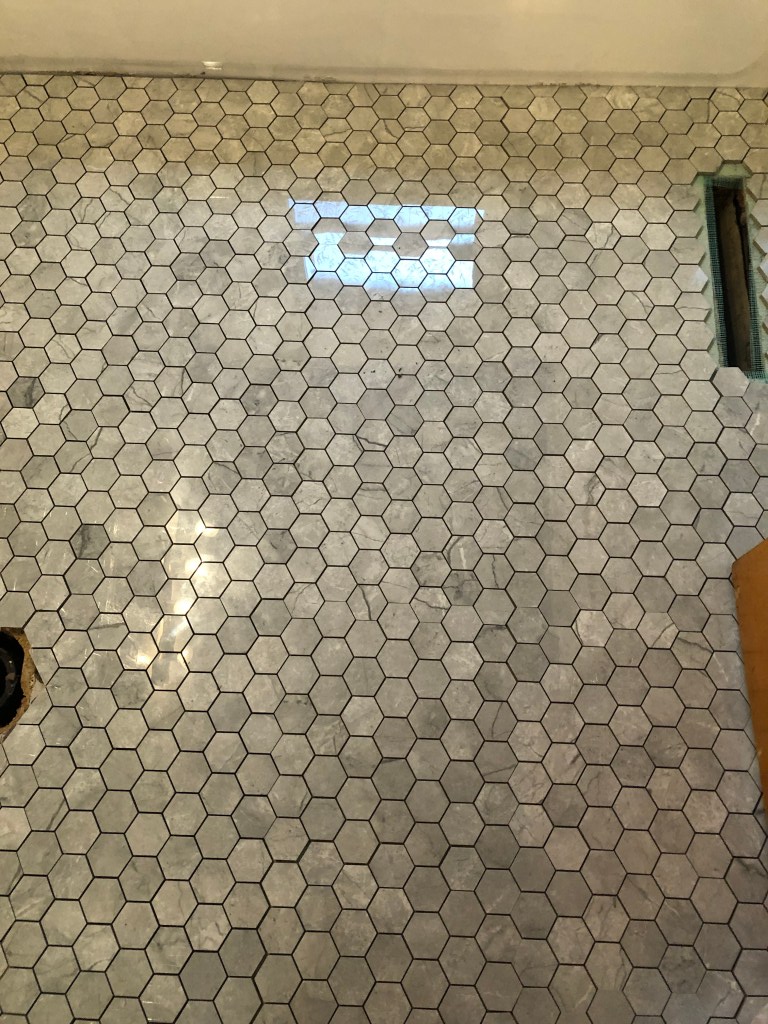
Lay tile out exactly how you’ll be laying them with mortar later
You cannot skip this step. You need to see everything laid out first before making cuts and mortaring the tiles onto the subfloor. Mortar is cement. If you mess up, tiles are not impossible to remove, but it can be difficult.
At first laying all the tiles out will seem like a crazy jigsaw puzzle, fitting all the sheets together piece by piece. But I promise it’s not that hard. Have someone else help with this step to hand you sheets as you place them around the room. I had my mother-in-law over to help me get started with tiling, and having an extra pair of hands went a long way.
Be sure to lay the sheets with a little space in between, so it matches the spacing of the tiles on the sheets, too. This way everything matches, and you can’t tell where one sheet ends and another begins.
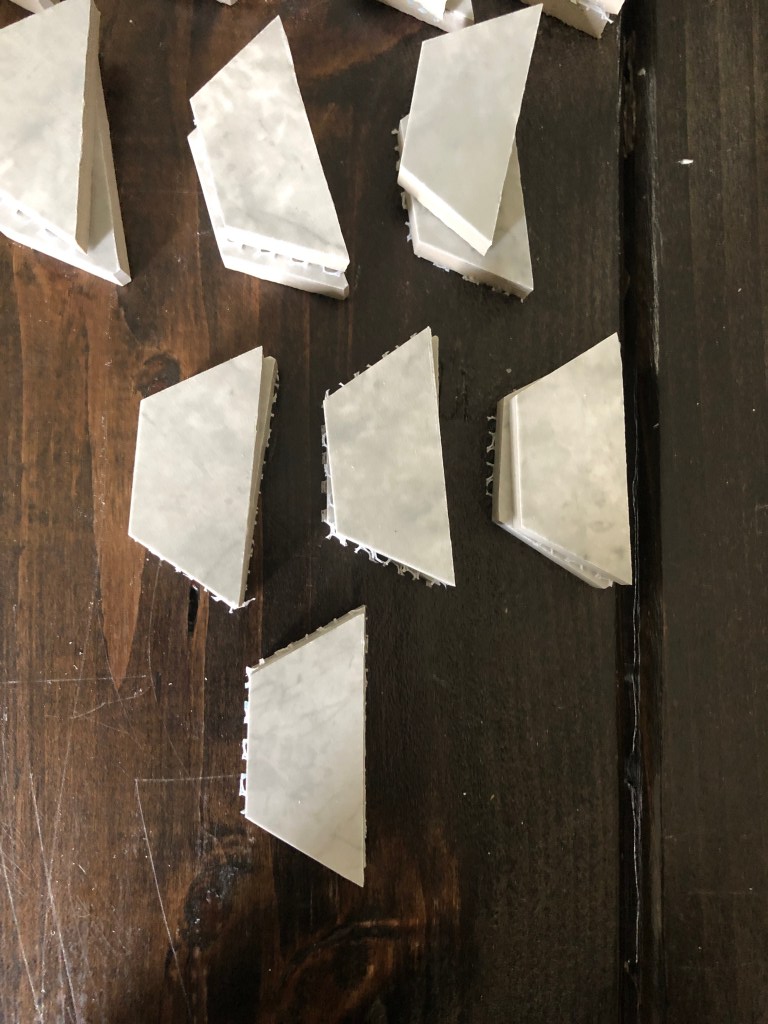
Make cuts with a tile snapper
Since they’re hexagonal tiles and already in sheets, you’ll need to make cuts for covering the perimeter of the room. Along the edges, where the floor and walls meet, at the very least. Figure in anything else like around water lines and the toilet area.
This tile cutter was great and well worth the $110 I paid. It would have cost about $50 to rent one and I knew I’d need this for two other future projects in the next year, so it made sense to make this purchase. It was so easy to use, with it cutting tile up to ½ inch thick. I practiced on a few tiles, and then watched a YouTube video, and it worked perfectly. I was making cuts like a pro in no time.
Mix up the mortar and start laying tiles
(If you buy pre-made mortar you can skip the mixing step.) Mix the mortar powder and water according to instructions.
I started by working my way from the farthest corner, in quadrants, until I got to the corner closest to the door. Again, make sure to leave space between sheets to match the spacing of tile on the sheets. Each sheet should blend in seamlessly with the others. Work quickly, so you won’t have to stop in the middle of tiling to mix and add more water. We used the quick setting mortar where you can walk on floors 6 hours later, so this was necessary.
Note: I also used a small plastic artist spatula that came in a brush set from the craft store in this step. The mini size worked great for spreading the mortar in small spaces.

Grout between the tiles
If you don’t have premade grout, you’ll need to first mix up the grout powder with water until a paste forms. Using your grout floater spread grout over and across tiles at a 45° angle. Make sure grout gets pushed into spacing between tiles, filling them before wiping them flush.
After letting it sit for 15-30 minutes, begin cleaning the excess grout off the tiles and wiping them clean. Use a bucket of water and grout sponge, wringing the sponge after every wipe and replacing bucket water after every few wipes.
Clean the tiles the day after
The day after, you will most likely still have a cloudy haze on the tile. This will happen no matter how clean you had it the day before. Simply wipe this clean with towels and a 1:1 ratio of vinegar-water. It should then be sparkly-clean.

Add baseboards and caulk the seams
Finally, the last step. You can add baseboard mouldings around the perimeter of the bathroom. Then caulk where the baseboards meet the floor and wall to prevent any water from seeping through. Can you tell I’m all about mold prevention? You can never be too careful!

Final thoughts…
Now that you know how to lay hexagonal floor tiles, you’ll be able to save hundreds of dollars. By completing a tiling project yourself, you’ll not only save money but you’ll also gain a new skill and boost of confidence. There’s nothing quite like knowing you can tackle any home project. Being self-sufficient is so important to me, and I’ll never regret teaching myself valuable skills like this.
More DIY Projects
How to Make an Old Door Look New
Refinish a Bathtub in 3 Easy Steps
How to Install a Pea Gravel Patio

Oh! Wow!
LikeLike
Seriously beautiful. I love the step by step guide for those of us who have never done this before. It seems challenging but doable!
LikeLike