Tour our new cottage bathroom! Our small bathroom makeover is finally complete, with a charming, old soul style. Peruse the tiled floors, new paint color, and more.

We started our small bathroom makeover in late summer. You may have seen my recent post about how to refinish a bathtub, where I easily and affordably revamped our bathtub in 3 simple steps. Now, we’ve been able to retile the bathroom floor and refinish the wall tiling throughout our bathroom. We also added in some other new pieces to freshen up the space!
We are so happy with the results of our small bathroom makeover project, and I knew I’d have to share this to hopefully inspire someone else. I love giving others new ideas for their home, too.
Read on to discover all about how we updated our small bathroom.


Small Bathroom Makeover
Wall Tile Refinishing
Our 1950s home has the typical square tile lining the walls of the bathroom. I decided I wanted to keep this vintage tile and refresh it with some new paint using this tub and tile refinishing kit.
It’s fairly easy to use, with only three steps in the process, and it dries quickly. It also only cost around $30. I will say it was much easier to refinish my bathtub than it was to refinish wall tiles, though. All the grout lines and the vertical painting made it trickier.
Though it’s not 100% perfect, we knew this would be a quick, affordable fix for now. It’s now a bright white compared to the tan speckled color that it once was.
My best advice, if you decide to go this route, is to work quickly and check for dripping frequently. It’s thick when brushing it on, so I recommend using quick, short strokes. Apply only a little paint at a time. It takes two coats, so be prepared to paint twice in a day.

New Floor Tile
My husband and I decided that if there was one thing we were going to splurge on in the bathroom it’d be on the floor.
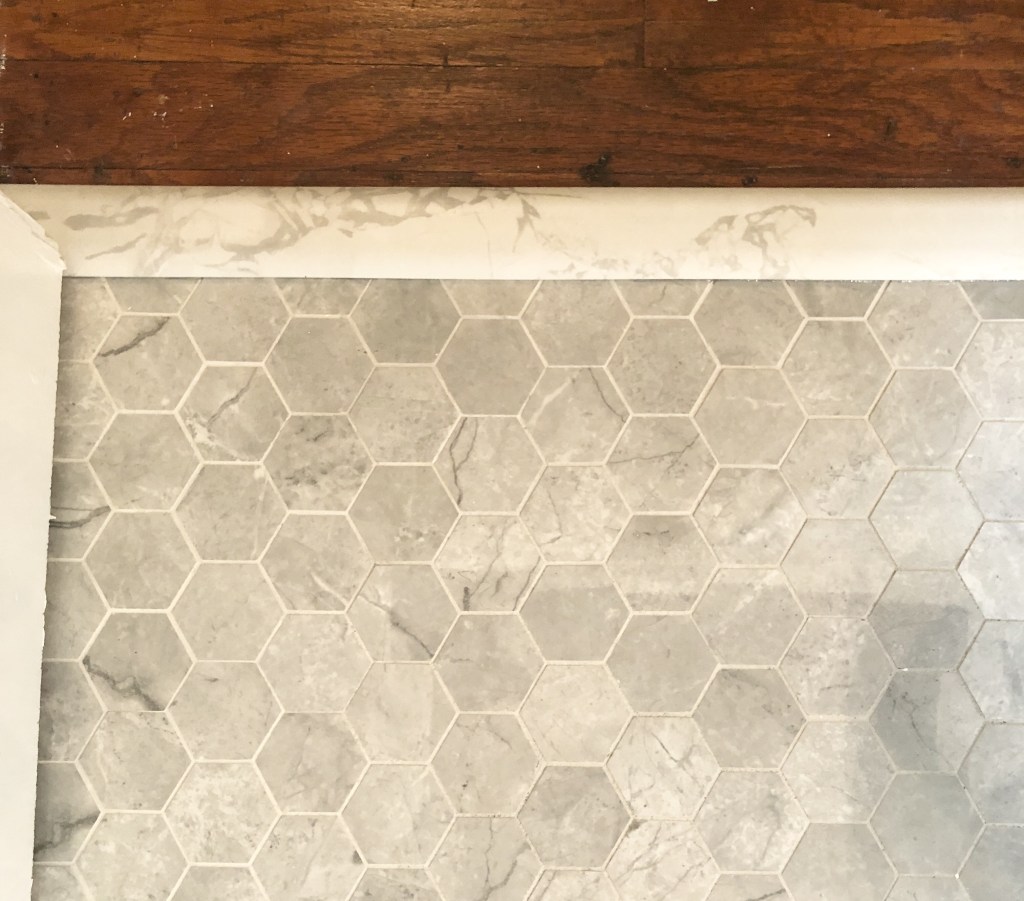
When I saw this hexagonal porcelain tile in Argento by Ellis + Fisher, I knew it was meant to be. After laying the tile, we grouted with some warm gray unsanded grout (Ultracolor Plus FA 10-lb Warm Gray All-in-One Unsanded Grout).
I’d dreamed of tile like this! Perfect for an antiquated look, it is both easy on the eye and practical for its durability and waterproofing capabilities.
I am so proud of this floor that I wrote all about my experience with tiling for the first time. You can read my post How to Lay Hexagonal Floor Tiles HERE. It wasn’t nearly as difficult as anticipated (the prep work was the hardest part), and because we had such a small space we still only spent $300 on the floor. This is affordable considering a larger bathroom could’ve cost upwards of $1,000.

Vanity Installation
We chose the most affordable, simple white vanity we could find. I knew I could always alter the cabinet doors, knobs, etc. later if I wanted. We also just wanted something fresh and clean—we weren’t super picky. Plus, we needed a small one that wouldn’t be overwhelming in our cute little bathroom.
The sink basin came with it, but we did have to buy the faucet (Dover Chrome 2-Handle 4-in Centerset WaterSense Bathroom Sink Faucet with Drain) separately. This was very affordable, too, and the vanity and faucet together cost only about $130.


Recessed Medicine Cabinet
We went with a basic recessed medicine cabinet. It was difficult finding the correct size to fill the empty space from the previous cabinet, but we found a cheap $30 medicine cabinet (White Mirrored Rectangle Medicine Cabinet) that we decided to trim down a bit to fit. Otherwise, for the size we needed, we’d be spending at least another $100 on finding the right one to fit the wall.
I was bent on not overspending on this project, so this was another area where we had to put in extra work to save a few dollars. It was so worth it, though. I love being able to store items behind the mirror and have some hidden extra space, no matter how small, for storage.

Small Cottage Bathroom Finishing Touches
Fixtures
We used a metallic gold spray paint (Universal Gloss Pure Gold Metallic Spray Paint and Primer In One) to update our light fixture that was old and worn. I also spray painted our honey-colored towel bar and ring using this matte black spray paint. And if we ever decide to change the color again it’ll be such a quick, easy fix.

I also can’t forget to mention the beautiful antique-style registers from Signature Hardware. I chose the black powder coat appert steel floor register and love it for this room. In fact, I only buy registers from this company. I love the regal, authentic look. Never underestimate the power of decor in a room. Sometimes the smallest touches can make or break a whole look.

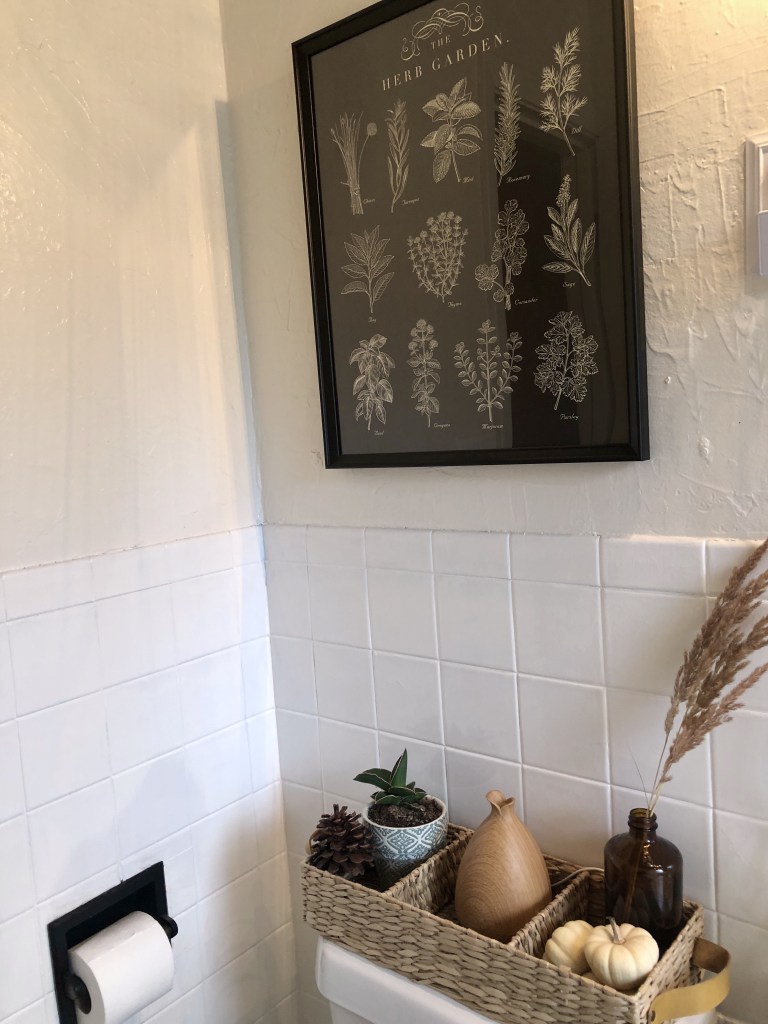
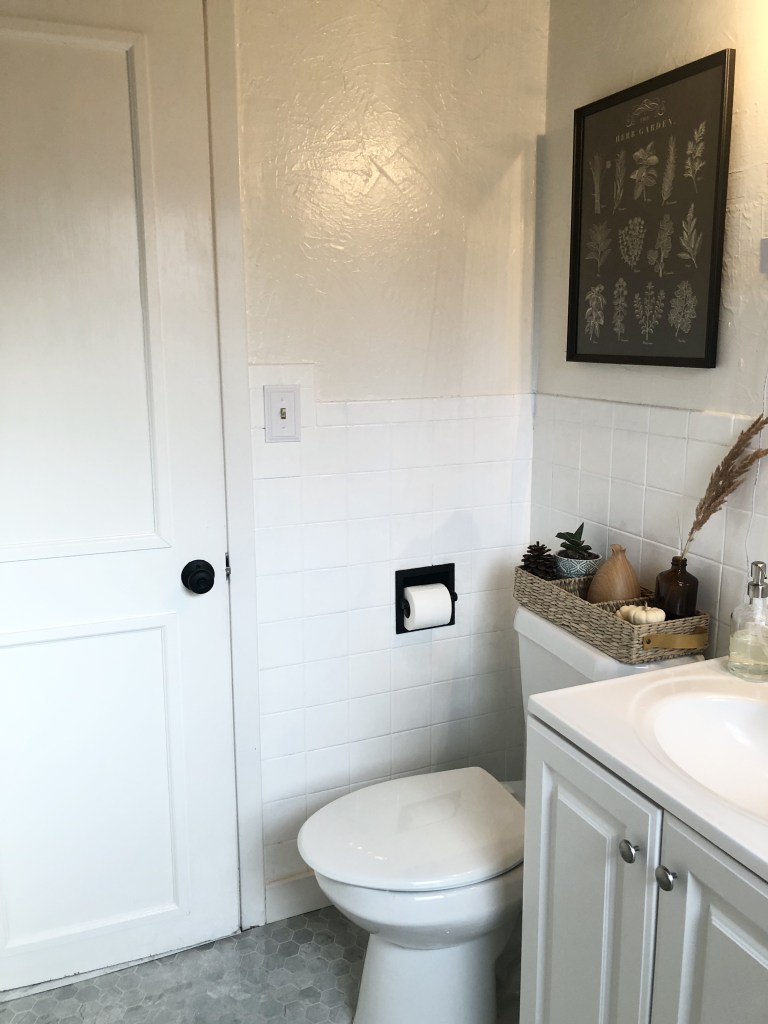
I picked an oil-rubbed bronze toilet paper holder from Amazon, but ended up spray painting it a matte black color to match the register and towel rack better. First, I tried the metallic gold paint and it came off a bit tacky looking, so I went for the matte black instead.
Trim
The baseboards we kept simple. I did make sure to opt for a mold-resistant, water-resistant alternative to wood. Keeping our bathroom healthy and clean is a top priority for me, so I prepped so many things with this in mind.
We ended up only needing this baseboard (1/2-in 8-ft Finished Polystyrene Baseboard Moulding) for our bathroom, so it was fairly simple to cut and install. We used some J-B Weld to make it stick to our porcelain tile. Then after this, we used this threshold for the transition from the wood flooring in the hallway to our porcelain-tiled bathroom floor.
Door
For the door, I actually ended up adding trim all around it on both sides and then painting it with three coats of white paint. We then changed the hinges and doorknob to match some other black fixtures in the bathroom. Doing this cost about half as much as buying a new door, and we didn’t have to worry about renting a truck to pick it up. You can read this popular door transformation how-to HERE.


Decorative Touches
I decided that if I was going to have a new bathroom I’d also want a new shower curtain to fit the new style. I fell in love with the blue-striped Magnolia shower curtain from Target. Simple and understated, it brings just enough charm to this room to make it have all the cottagecore feels.

Last, I added a eucalyptus hoop wreath and a garden poster with frame from IKEA. We switched out a disposable soap dispenser with a clear glass reusable dispenser.
We just love this simple, collected look!

Final thoughts…
We most certainly spent some money on investing in quite a few tools to complete this cottage bathroom restoration project. We knew we’d be doing more tiling in the future and invested in a tile cutter. We also needed several other small tools for mortaring and grouting, but overall I think we got by without spending too much. We are so in love with this bathroom. We had been wanting to change this since day one!

More Home Inspiration
How to Install a Pea Gravel Patio

Beautiful!! Fresh Eucalyptus in the showers in the fall/winter are Amazing!! Love it! We do the same!!
LikeLike
So pretty! I live all the little touches. The floor is so amazing!
LikeLike
*love
LikeLike