Discover how to make the perfect fall wreath just in time for sweater weather. I show you, step by step, how to put together a wreath that will last for years to come.
Creating a warm and welcoming feel to my house is important. Part of the reason I love the cottage style is because of how cozy and casual it can be. It’s lived in and realistic with its mismatched pillows and throws askew in the living room, tarnished pots and pans from cooking with love, and misplaced books from late night reading when one can’t possibly go to bed yet.
One small, simple way I like to welcome my guests is with a homemade wreath, which is why I’m going to show you how to create the perfect wreath for fall this year.
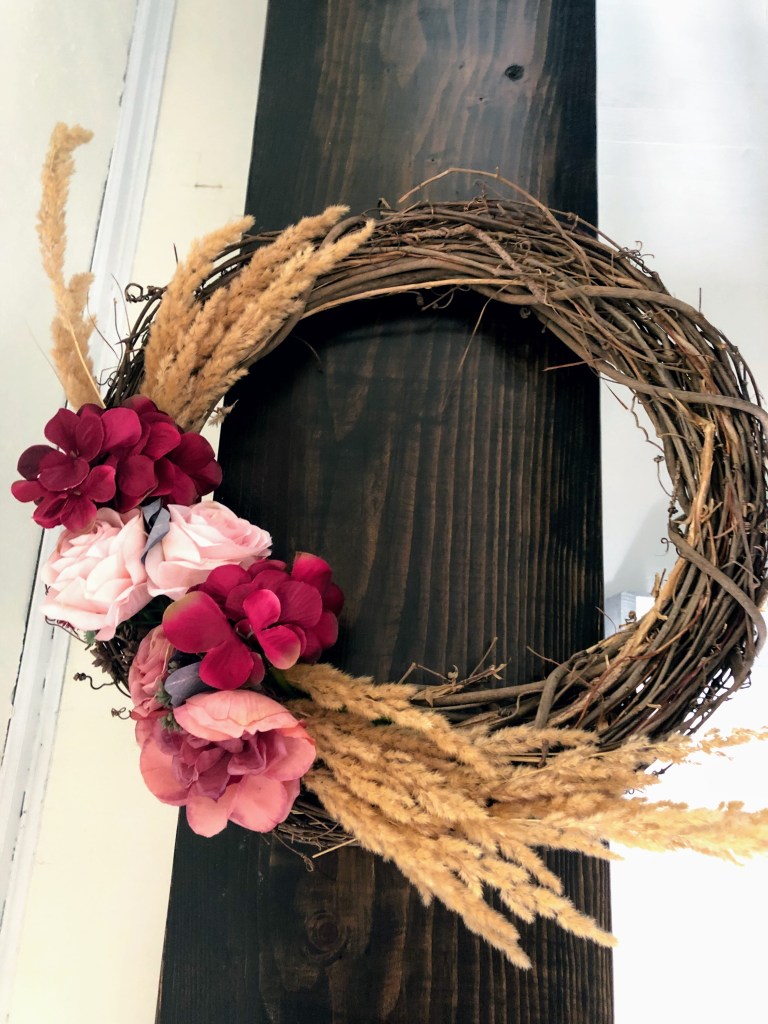
I display my wreath on my front door, and I like to change it out at the beginning of each season. It may seem so trivial to some, but I like to think it gives guests a tiny taste of what our home is all about. It’s the easiest way to make a statement to passersby and neighbors. I also like to think it keeps me more in tune with the changing of the seasons and a fun tradition to start each one.
Aesthetics play an important role in creating a home and can really set the tone of the environment. A simple wreath on the front door is all it takes to spruce up your porch.
Why make a homemade wreath for fall?
With my quick and easy tutorial, you can easily have a wreath made ahead for each season. Incorporate this craft into a family night each season or include it as a housewarming gift to a friend or family member. So many great uses of this craft!
I will admit, I’ve purchased a couple of pre-made wreaths online. Both were expensive, and one literally melted so much from the hot sun. The poor faux lemons look like a smooshed yellow mess.
I’ve come to realize that it’s not time consuming nor expensive to craft my own wreath. I’ve decided to stick to this ritual from here on out.
You don’t even have to make a new wreath each season. Maybe twice a year is plenty for you, or if you love crafts and celebrate every holiday under the sun maybe you’ll change them monthly.
For myself, one wreath each season fits my lifestyle well. I may not celebrate every single holiday that others may celebrate, and I sometimes find holiday-themed decor a bit gauche if not styled correctly. Holiday decor tends to consist mainly of plastic, which I’m not a fan of, and really loud primary colors. These don’t fit in with my overall vibe and color scheme for my house, so I opt for styling by the season instead.
I personally enjoy bringing calming nature-based elements into my home. I use this same philosophy when creating and styling a wreath.
This fall I decided on styling my wreath with some wheatgrass, along with some pink and magenta faux flowers for a pop of color.
I always think of gorgeous deep purples, reds, and browns when I think of the autumn season. I can be a bit of a minimalist when it comes to decor and sometimes follow the “more is less” mentality. In turn, I tend to just pick a couple of items to add to a wreath when I make one.

Supplies and Tools – Make a Fall Wreath
Hot glue gun
Plain wreath base, medium-large depending on your preference I prefer woven wreaths over metal hoops, but I won’t stop you from creating your dream wreath if you have your heart set on using one—just know you can’t always do as much when it comes to adding decorations
Faux flowers and foliage (or real if you don’t mind them drying out)
Floral wire cutters
Floral wire, optional
Other ideas: glitter, tiny knickknacks like miniature figurines that can be nestled in, burlap strips for making bows throughout or for hanging, decorative fairy lights

How to Make a Fall Wreath
Step One:
First, I find the cheapest base wreath I can find from a craft store or thrift store. Then, I begin by deciding which side I want to be the top and whether I want to decorate it all the way around. Alternatively, if you want to take a more modern approach you can create a half wreath. You can decorate the bottom half or go up one side as I did.
Step Two:
On this particular wreath, I decided I wanted to decorate with just two materials: faux flowers and faux wheatgrass. I thought this would be a perfect visual to represent the last harvesting of wheat and grains for the season.
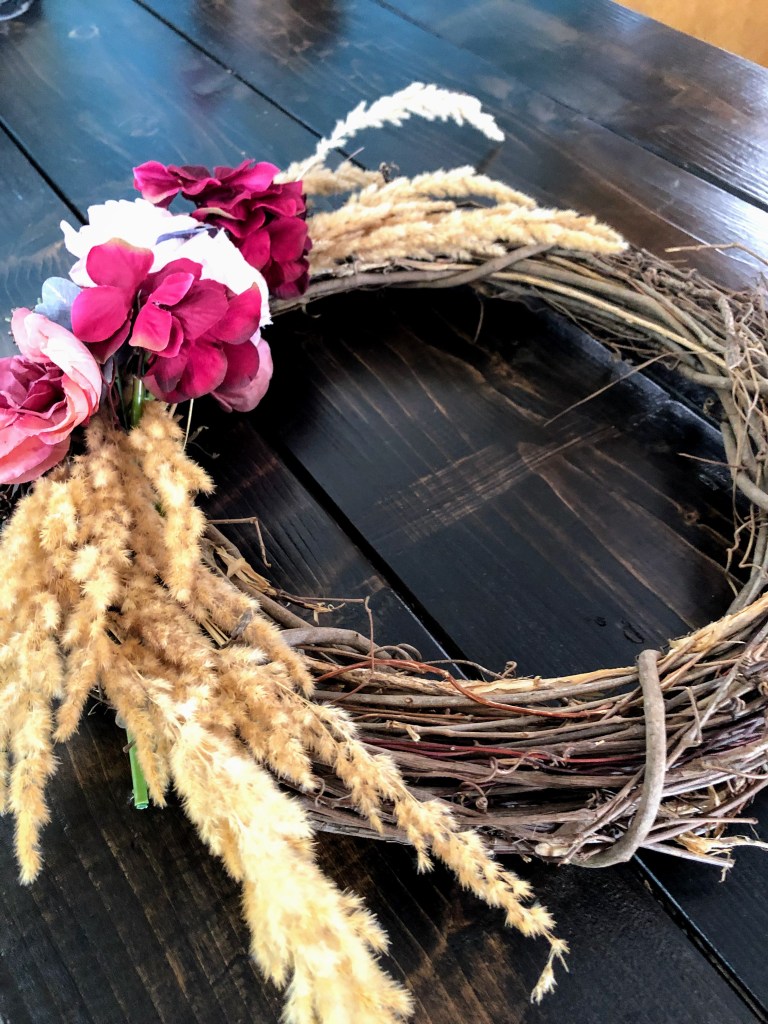
To begin applying, I wove the long stems of the wheatgrass—which acted more as a filler—into the wreath. Arrange so that each one is facing the same way. Repeat this, staggering each one, until you have gone about a quarter around the wreath.
At this point you are welcome to trim some of these ends if the long stems won’t stay tucked in. You will want it to look natural but not messy, so try your best to keep it looking tidy. Using a hot glue gun could come into use here. For example, if you can’t get pieces to stay in and you just need them to stay in place.

Then, mirror this on the other side by working your wheatgrass into the other quadrant of the wreath on the opposite side. At this point, your wheat grass should cover about half of the wreath. Each side should be pointing upward if you’re looking at the center of the wreath.
Step three:
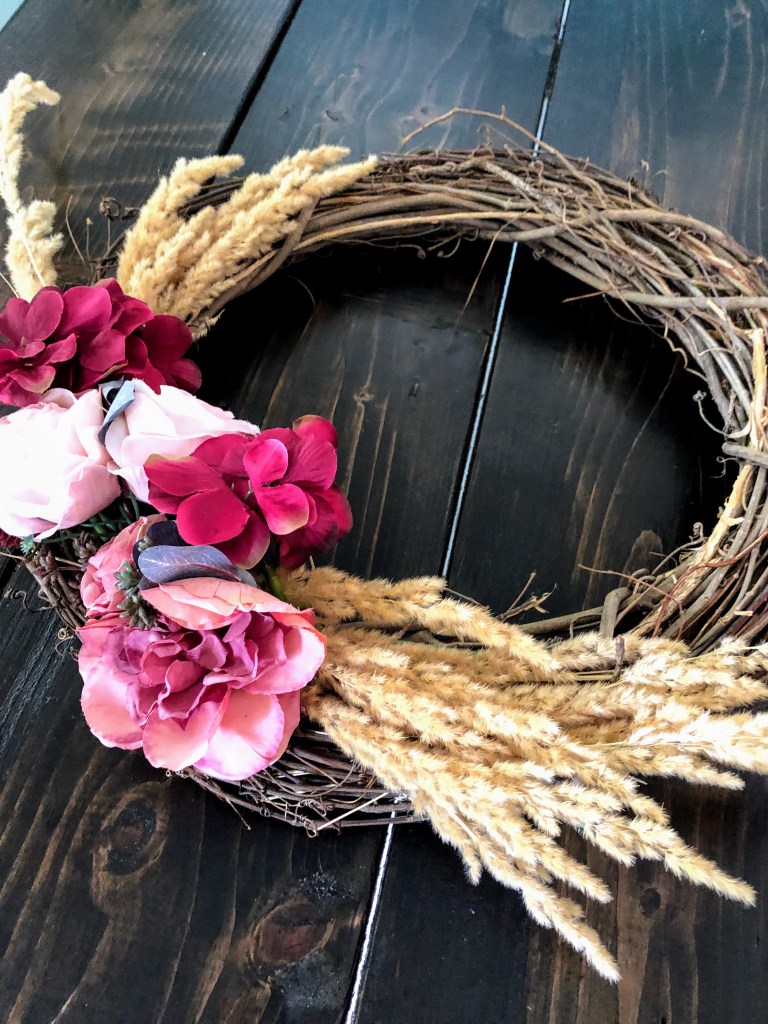
Last, you will need to add in your centerpiece. This is the main attraction that will catch the eye. I place this in the center of the wheatgrass placement.
I love using faux flowers, like I did here, to make it pop with color and to imbue a sense of elegance without any overly complicated designs. Flowers are so versatile because of their wide range of colors, patterns, textures, and sizes. Take advantage of this.
You could add plenty of smaller flowers with 2-3 large ones that contrast in color and juxtapose one another. Here I used a lighter pink and a deep magenta that complemented one another without fighting for too much attention.
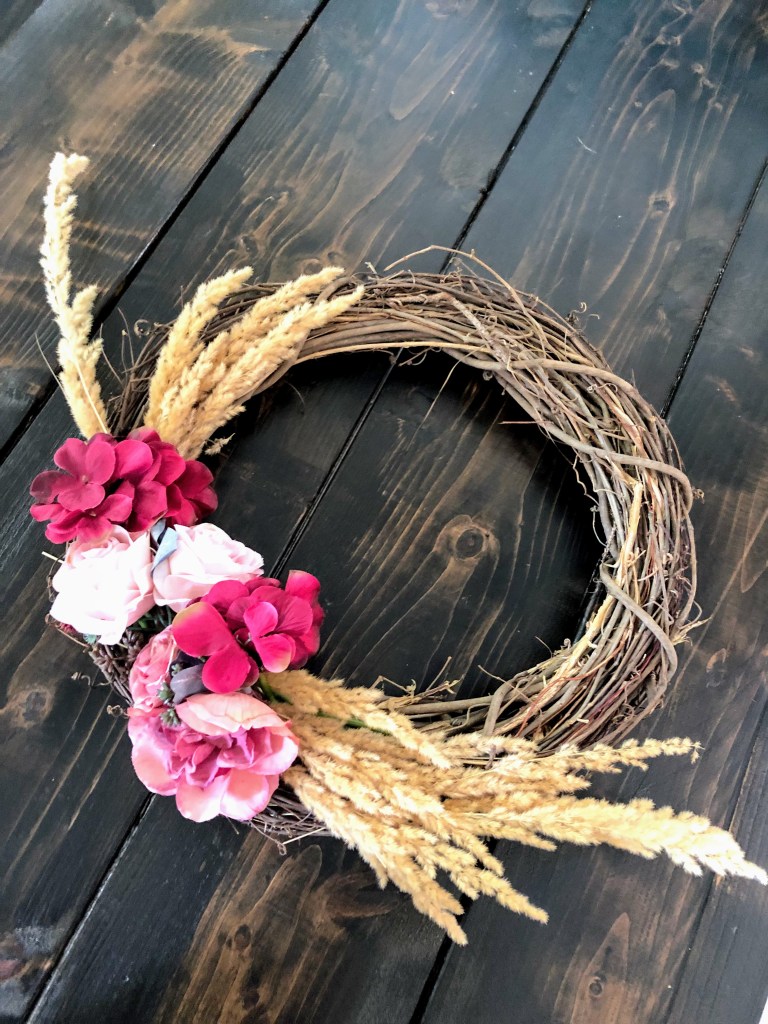
Secure these in place using floral wire, hot glue, or simply weaving it into the wreath’s fibers. I decided to keep mine simple and stop here. But you could do so many things at this point—add pine cones in bare spots, wrap some jute fibers around portions of it in a neat and tidy fashion. Add a sign that fits in the center hole if you want something modern. The possibilities are endless.

I plan on reusing the four wreaths I’ve made for the next few years until I get bored with them. This will be great because now each season I can just pull them out of storage.
Tips to Make a Fall Wreath
You could also be really frugal and use a single wreath base that you recycle each season. Simply change the arrangement and materials you use each time.
For example, instead of buying four wreath bases (one for each season) you could buy one and decorate the same one at the beginning of each season. Then take it apart at the end of the season, changing out your decorations. Just be sure you aren’t going crazy with the hot glue in this instance because it will be hard to remove it and then reuse those same supplies for numerous years.
I’ve used both real and faux foliage for decorating. The advantage with faux flowers and leaves are that they last a while, staying remarkably beautiful for years. On the other hand, things we often find in nature, say, pine cones, cypress branches, lavender, or ivy, are free and often the perfect touch to add without even leaving your neighborhood. Many times these are easy to find and may even look nice after they’ve dried.
Eucalyptus and baby’s breath are both wonderful examples of foliage that look gorgeous long after they’ve expired. I’ve even used holly and olive branches during the holiday season, in winter, and they’ve held up quite nicely.
If you can’t find these in your backyard, Trader Joe’s is a great store to pick a bundle of these up at an affordable price.
Whatever you choose to create, do it with authenticity and fervor. This is your home for welcoming those you love, and I have the headstrong opinion that it should be both beautiful and practical to you and your family.
Let me know in the comments if you’ve ever made your own wreath before and what materials worked well for you. I’d love to hear your ideas.
More DIY Inspiration
Refinish a Bathtub in 3 Easy Steps
Create a Thanksgiving Tablescape
How to Strip a Door for Beginners
Make a Fall Wreath

Learn how to make a unique fall wreath to start the season with.
- Hot glue gun
- Floral wire cutters
- Plain wreath base
- Faux flowers and foliage
- anything extra (fairy lights, glitter, burlap strips, etc.)
- Floral wire (optional)
First, I find the cheapest base wreath I can find from a craft store or thrift store. Then, I begin by deciding which side I want to be the top and whether I want to decorate it all the way around. Alternatively, if you want to take a more modern approach you can create a half wreath. You can decorate the bottom half or go up one side as I did.
To begin applying, I wove the long stems of the wheatgrass—which acted more as a filler—into the wreath. Arrange so that each one is facing the same way. Repeat this, staggering each one, until you have gone about a quarter around the wreath.
At this point you are welcome to trim some of these ends if the long stems won’t stay tucked in. You will want it to look natural but not messy, so try your best to keep it looking tidy. Using a hot glue gun could come into use here. For example, if you can’t get pieces to stay in and you just need them to stay in place.
Then, mirror this on the other side by working your wheatgrass into the other quadrant of the wreath on the opposite side. At this point, your wheat grass should cover about half of the wreath. Each side should be pointing upward if you’re looking at the center of the wreath.
Add plenty of smaller flowers with 2-3 large ones that contrast in color and juxtapose one another. Here I used a lighter pink and a deep magenta that complemented one another without fighting for too much attention.
Secure these in place using floral wire, hot glue, or simply weaving it into the wreath’s fibers. I decided to keep mine simple and stop here. But you could do so many things at this point—add pine cones in bare spots, wrap some jute fibers around portions of it in a neat and tidy fashion. Add a sign that fits in the center hole if you want something modern. The possibilities are endless.
You could also be really frugal and use a single wreath base that you recycle each season. Simply change the arrangement and materials you use each time. For example, instead of buying four wreath bases (one for each season) you could buy one and decorate the same one at the beginning of each season. Then take it apart at the end of the season, changing out your decorations. Just be sure you aren’t going crazy with the hot glue in this instance because it will be hard to remove it and then reuse those same supplies for numerous years.
I’ve used both real and faux foliage for decorating. The advantage with faux flowers and leaves are that they last a while, staying remarkably beautiful for years. On the other hand, things we often find in nature, say, pine cones, cypress branches, lavender, or ivy, are free and often the perfect touch to add without even leaving your neighborhood. Many times these are easy to find and may even look nice after they’ve dried.
Eucalyptus and baby’s breath are both wonderful examples of foliage that look gorgeous long after they’ve expired. I’ve even used holly and olive branches during the holiday season, in winter, and they’ve held up quite nicely. If you can’t find these in your backyard, Trader Joe’s is a great store to pick a bundle of these up at an affordable price.

6 thoughts on “How to Make a Perfect Fall Wreath”