Salt Dough Christmas Ornaments are the perfect way to dress your tree up this holiday season. Using just a couple of basic ingredients and a cute mold, you’ll have homemade ornaments that scream “cottagecore” in no time.

This post may contain affiliate links. Please read our disclosure policy.
Salt dough ornaments are so emblematic of Christmas. These Cottagecore Christmas Ornaments are too easy to make and lovelier than ever for a cottage-style home like ours. Last year, I opted for something simple. It was a last minute holiday activity, so I opted for plain round ornaments to add a little something else to my Scandinavian Christmas Tree.
This year, however, I wanted something a little fancier. Something a little more… cottagecore.
I had to put my stamp on this classic holiday ornament, so I found a wooden cookie mold HERE and decided to use it for making these cottagecore salt dough Christmas ornaments instead.
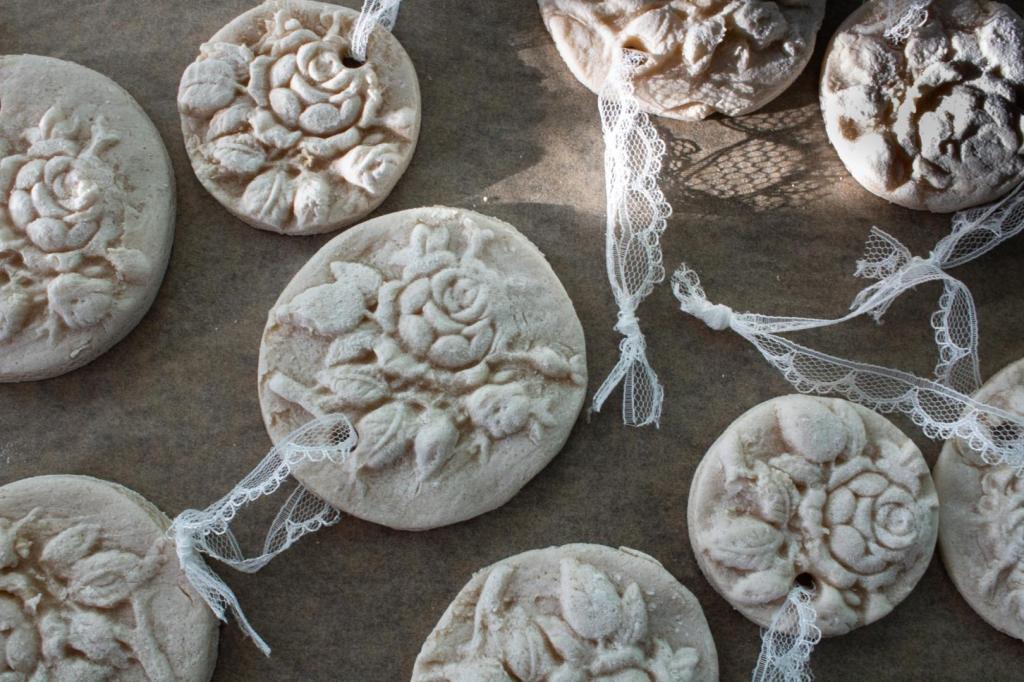
This resulted in elegant, timeless beauty that works on any neutral or Scandinavian-inspired tree.
I am not the type to opt for flashing lights that could give someone a seizure or those huge, over-the-top red bows. There is no glitter or towering, sparkling star. No mismatched ornaments here either. Instead, I opt for a simple, understated look that blends both the modern and rustic in its own special way.
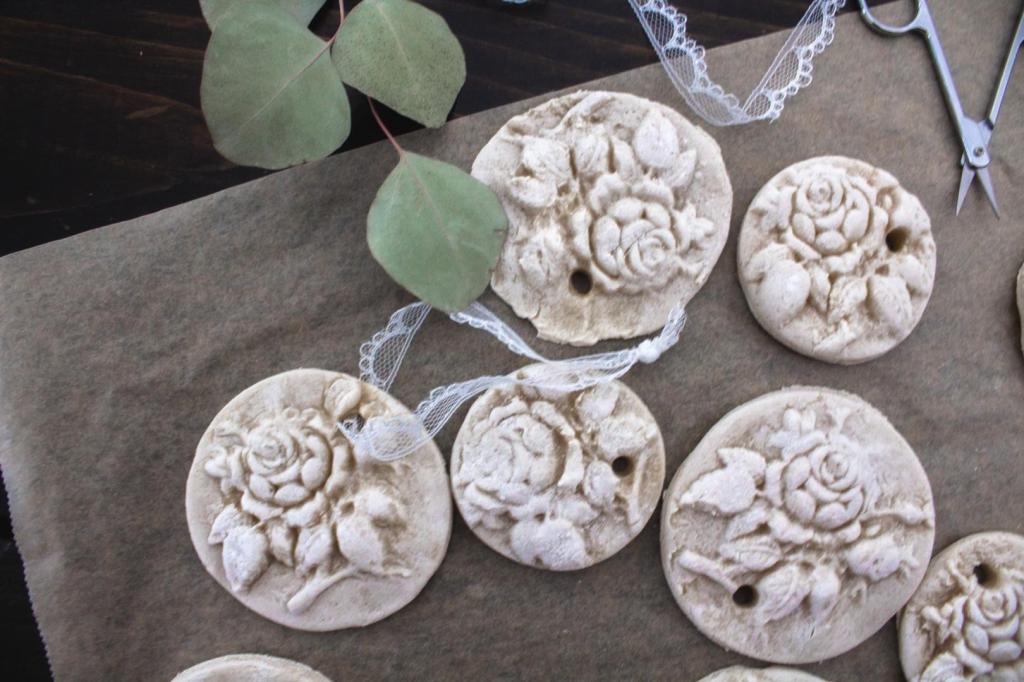
These ornaments blend in so cleverly with the striped ribbons and wooden bead garlands, too. At closer inspection, they reveal a floral design that almost makes me second guess the season. (Which also means these could work for a spring project!) However, I do love the cottage feel it brings to our unique little tree.
These cottagecore Christmas ornaments were truly the best thing I could’ve added.
Now, let me show you how I made these Cottagecore Salt Dough Christmas Ornaments.
Why you should make Salt Dough Christmas Ornaments
- Easy to make alone or with kids
- Unique ornaments that fit your style
- Non toxic
- Affordable ingredients
How long do salt dough ornaments last?
Salt dough itself can be made up to one week in advance before baking. After baking, salt dough ornaments can last for years and years. After a bit of research, I noticed several people saying that they recommend using some sort of sealer to preserve salt dough Christmas ornaments. However, I made some last year and never used a sealer and mine are perfectly fine still. I do recommend storing them properly for this to happen, though. Which brings me to my next question…
How do I store finished salt dough ornaments?
Store your finished Cottagecore Christmas Ornaments in boxes or containers where ornaments are layered with bubble wrap or some sort of cushioning to prevent breaking. Seal the container well to keep them dry.
Tools/Materials You Will Need
Mixing bowl
Wooden spoon or rubber spatula
Measuring cups
Cookie sheets
Parchment paper or silicone baking mat
Round biscuit/cookie cutter
Straw or skewer
Ribbon or twine
Scissors

Ingredients in Cottagecore Salt Dough Christmas Ornaments
2-2 1/4 cups flour – Flour acts as the base of this salt dough recipe. Use all-purpose for a creamy white color that is perfect for the winter season.
1/2 cup salt – Salt is used to help prevent the dough from puffing and rising. I have seen recipes use anywhere from ¼ cup to 1 cup of salt per cup of flour. My recipe uses ½ cup of salt.
1 cup water – Water turns the flour base into a malleable dough that can be shaped into the perfect holiday ornament.

How to Make Salt Dough Christmas Ornaments
Start by preheating the oven to 200ºF.
Next, mix the salt and flour together in a mixing bowl using a wooden spoon or rubber spatula.
Once combined, knead the dough until it is well mixed and the dough is smooth. Be sure it is not too sticky or it will be difficult to remove from the molds.

Turn the dough onto floured parchment paper.
Then generously flour your cookie mold and gently press a chunk of the dough into the floured cookie mold. Cover the entire mold and press it into a somewhat even layer.

Turn the cookie mold upside down and it should slide right off. If it is any harder than this to remove then your dough is too wet.

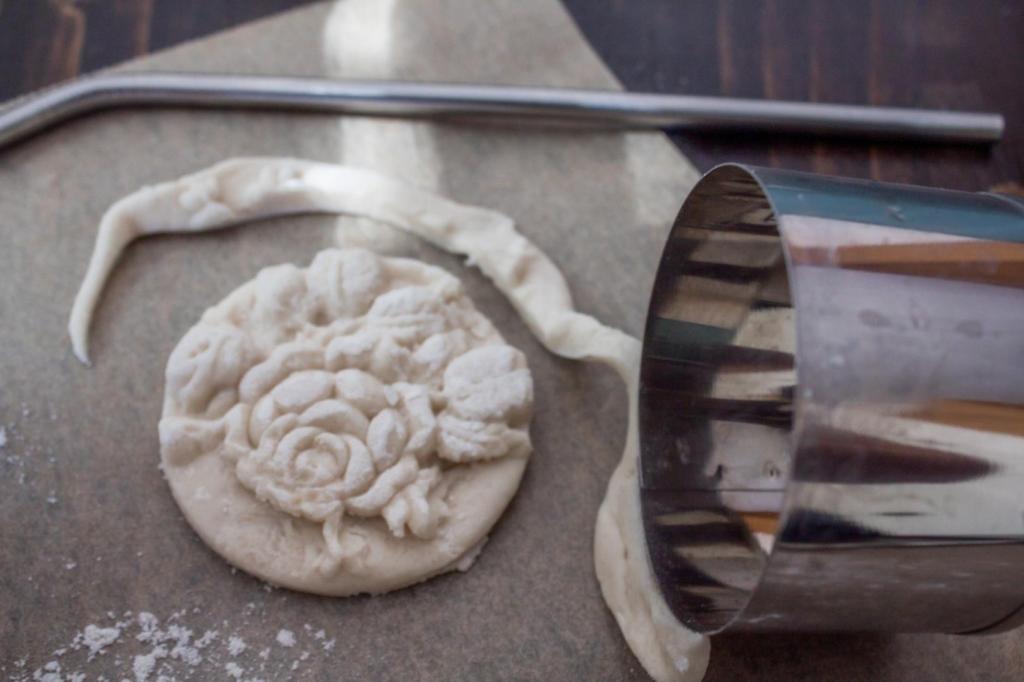
Now, using your round biscuit/cookie cutter, trim the edges of the cottagecore Christmas ornament off.
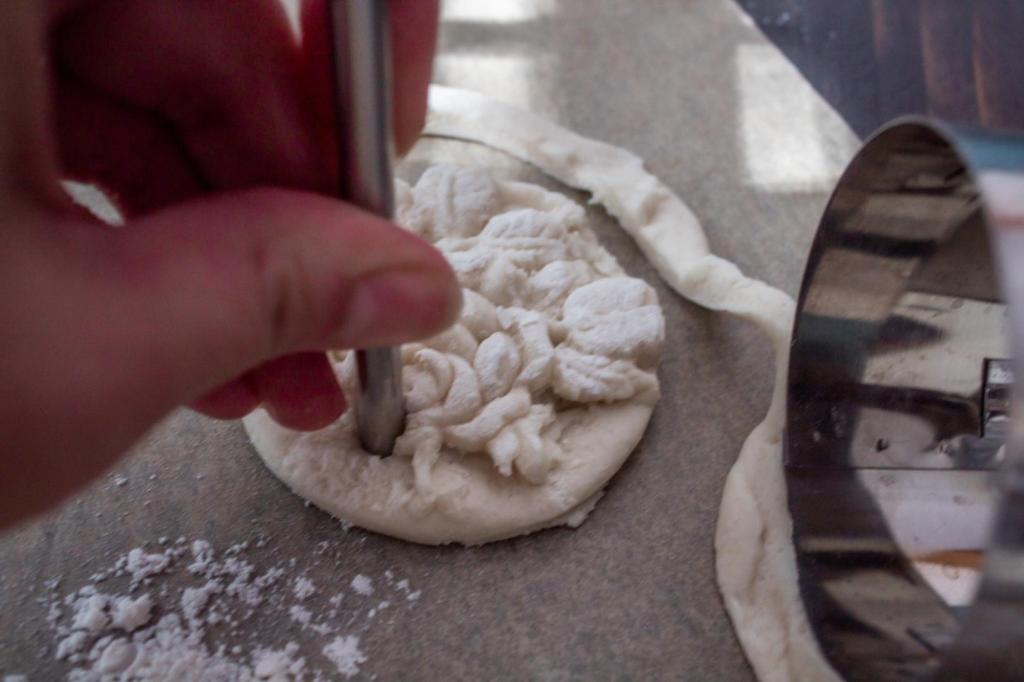
Use a straw or skewer to make a hole at the top where a ribbon will be thread through later. Just be sure not to do this too close to the edges.

Carefully lay the ornaments onto parchment paper or a silicone mat on a cookie sheet, about one inch apart.

Gather unused dough together and repeat these steps until you have used all the dough up.
Bake at 200ºF for 2 hours, gently turn them over (as long as the top is hard and dry), and let them bake for another 2 hours.

When done, salt dough Christmas ornaments will be hard and dry. If the bottoms are not fully done you can leave them out for a day or two before hanging them and they’ll dry eventually.
Once they are all completely dry and hard, tie some ribbon around the ornaments.


Tips for success
The trick to baking salt dough is to bake it at a very low temperature. You do not want them browning. We want the creamy white color to last and therefore need to bake it low and slow.
If you really want to add a festive spin to these Cottagecore Salt Dough Christmas Ornaments, subtract some flour from your recipe and replace it with cinnamon. This will add a light golden brown hue and light cinnamon aroma to the ornaments.
Try adding water one tablespoon at a time if your dough becomes cracked and too dry. If it’s too wet, add a tablespoon of flour at a time until you get the desired consistency.

More Holiday Inspiration
DIY Eucalyptus Christmas Wreath
DIY Gift Baskets for the Holidays
Scandinavian Christmas Tree Decorating
Cottagecore Salt Dough Christmas Ornaments

Salt Dough Christmas Ornaments are the perfect way to dress your tree up this holiday season. Using just a couple of basic ingredients and a cute mold, you’ll have homemade ornaments that scream “cottagecore” in no time.
- mixing bowl
- wooden spoon or rubber spatula
- measuring cups
- cookie sheets
- parchment paper or silicone baking mats
- cookie mold
- round cookie cutter
- pair of scissors
- straw or skewer
- ribbon
- 2-2 1/4 cups all-purpose white flour
- 1/2 cup salt
- 1 cup water
Start by preheating the oven to 200ºF.
Next, mix the salt and flour together in a mixing bowl using a wooden spoon or rubber spatula.
Once combined, knead the dough until it is well mixed and the dough is smooth. Be sure it is not too sticky or it will be difficult to remove from the molds.
Turn the dough onto floured parchment paper. Then generously flour your cookie mold and gently press a chunk of the dough into the floured cookie mold. Cover the entire mold and press it into a somewhat even layer.
Turn the cookie mold upside down and it should slide right off. If it is any harder than this to remove then your dough is too wet.
Now, using your round biscuit/cookie cutter, trim the edges of the cottagecore Christmas ornament off.
Use a straw or skewer to make a hole at the top where a ribbon will be thread through later. Just be sure not to do this too close to the edges.
Carefully lay the ornaments onto parchment paper or a silicone mat on a cookie sheet, about one inch apart.
Gather unused dough together and repeat these steps until you have used all the dough up.
Bake at 200ºF for 2 hours, gently turn them over (as long as the top is hard and dry), and let them bake for another 2 hours.
When done, salt dough Christmas ornaments will be hard and dry. If the bottoms are not fully done you can leave them out for a day or two before hanging them and they’ll dry eventually.
Once they are all completely dry and hard, tie some ribbon around the ornaments.
The trick to baking salt dough is to bake it at a very low temperature. You do not want them browning. We want the creamy white color to last and therefore need to bake it low and slow.
If you really want to add a festive spin to these Cottagecore Salt Dough Christmas Ornaments, subtract some flour from your recipe and replace it with cinnamon. This will add a light golden brown hue and light cinnamon aroma to the ornaments.
Try adding water one tablespoon at a time if your dough becomes cracked and too dry. If it’s too wet, add a tablespoon of flour at a time until you get the desired consistency.

6 thoughts on “Cottagecore Salt Dough Christmas Ornaments”