Easy Artisan Bread is the most authentic, chewy bread of your dreams. With minimal effort, this simple, rustic bread is ready to be served alongside your favorite comfort dish.

This post may contain affiliate links. Please read our disclosure policy.
Glutinous, soft, chewy bread. One of my favorite things in existence! That’s why I knew I had to develop my very own easy artisan bread recipe. It’s simple, requires no kneading, and tastes bakery fresh.
My easy artisan bread dough gets mixed up, sits in the fridge for a slow rise over 12 hours, and then gets baked into a crusty, soft bread in about 45 minutes.
Using traditional processes, I make this completely by hand. After baking, this easy artisan bread manages to last 4-5 days on the counter. That is, if no one eats it up before then!

Sounds easy, right? That’s because even a complete beginner could make this easy artisan bread recipe.
I have grown to love scoring the dough beforehand (using this bread lame), honing my creative skills by cutting stunning designs into it. There are so many different designs, and I love seeing how each one turns out after baking. Sometimes even when I think I’ve messed up, I’m pleasantly surprised with a gorgeous rise that somehow fixed an uneven, jagged cut.
This bread will leave you feeling like you’ve gained an entirely new skill. It’s great for when you want fresh baked bread but don’t have the time or energy to knead it for 10 minutes straight, possibly multiple times, and then wait for it to rise on top of that.
Though my easy artisan bread dough does rise slowly in the fridge over a 12-hour period, it’s not like you’re actually waiting on it. You can simply forget about it overnight and go on with your life without the worry of overproofing the dough.
I start the dough the day before I want to use it for sandwiches or pair with a soup and then pop it in the oven the day of. Any leftovers are ready for snacks/meals over the next few days (if it lasts that long).
Did I mention it pairs well with salads, too? Or by itself with butter slathered on? Or dipped in olive oil with herbs?
It’s just a gift. In fact, you could probably bake one of these stunning loaves up and place it in a homemade gift basket as part of a gift. I sure wouldn’t refuse it!
With a complex, sophisticated taste you just can’t go wrong with this easy artisan bread!
Common Artisan Bread Questions
Do I have to place it in the fridge overnight?
If you don’t want to wait quite as long for it to rise, you could add more yeast and just let it rise at room temperature for a couple of hours, but it won’t be a well-developed artisanal bread then. It would turn out more like a soft, fluffy wonder bread. If that’s what you’re looking for, you should probably use a different recipe. The whole point of this bread is to get some depth and flavor into it from the slow fermentation in the refrigerator.
Chilling the dough also makes it much easier to score the bread. Creating a cleaner cut, the blade can reach more deeply–provided you make swift, even movements when scoring–preventing ragged cuts that drag the dough. You’ll know exactly what I mean if you’ve ever sliced into a warm dough with a blade before. Lots of stickiness and less control of the blade.
Why shouldn’t I knead the bread dough?
This bread dough doesn’t provide a soft, fluffy texture like you’d have in a standard yeast bread. It’s meant to be like a traditional, rustic bread that takes longer for flavors and texture to develop. You really want a chewy bread with an aerated crumb, so it doesn’t need to be kneaded. Additionally, the dough is more sticky and wet than kneaded bread dough. This moisture allows the proteins to move more freely, developing gluten all on their own.
What if I don’t have a bread lame? Do I have to score it?
You can just use a clean, cheap razor blade (or even scissors) you pick up from a hardware store if you don’t own a lame. It may actually be easier to use and give you easier control of the blade if you’ve never used a bread lame before. Scoring it isn’t always necessary, but it is recommended because it will determine how the bread rises making for a more predictable baked loaf. Scoring it allows you to choose where and how it rises to ensure it cooks evenly and develops a proper “oven spring.”
What if I don’t own a dutch oven?
A dutch oven traps steam in it which creates the sought after crispy, brown outer crust on a bread. If you were to use a traditional baking sheet, you could always cover it with foil to act as an enclosure, trapping the steam–but results aren’t as guaranteed. I’ve done this once before when I didn’t own a dutch oven. It worked out okay, but I prefer a dutch oven.
Ingredients
3 cups flour
1 1/2 cups lukewarm water
2 tsp salt
1 tsp yeast
Tools You Need
Bread lame, razor, or scissors
Parchment paper
Mixing bowl with lid
Measuring cups and spoons
How to Make Easy Artisan Bread
Combine all the dry ingredients in a mixing bowl using a whisk.
Stir in lukewarm water with a wooden spoon or by hand, mixing until well combined. Dough will be sticky.
Store the dough, covered, in the fridge overnight for 12-14 hours.
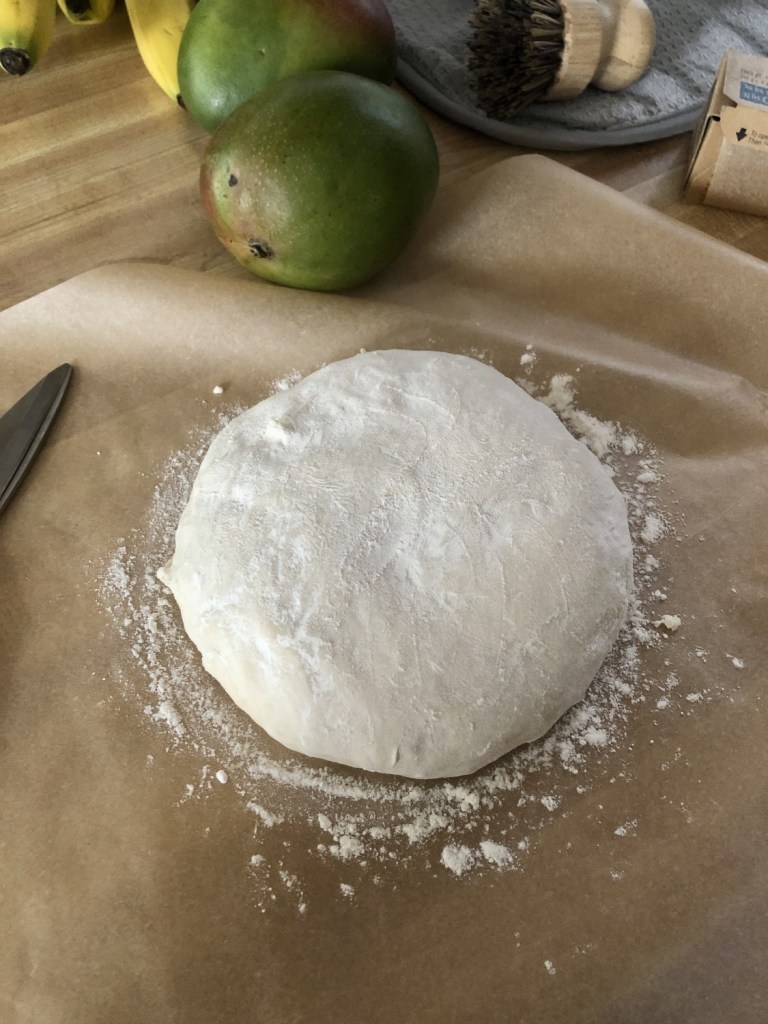
Remove dough from the refrigerator and place on a lightly floured surface, forming it into a ball. The dough may have some bubbles from fermenting–this is a good thing. It means the yeast is actively working.

Place the dough on parchment paper & dust the top with flour.
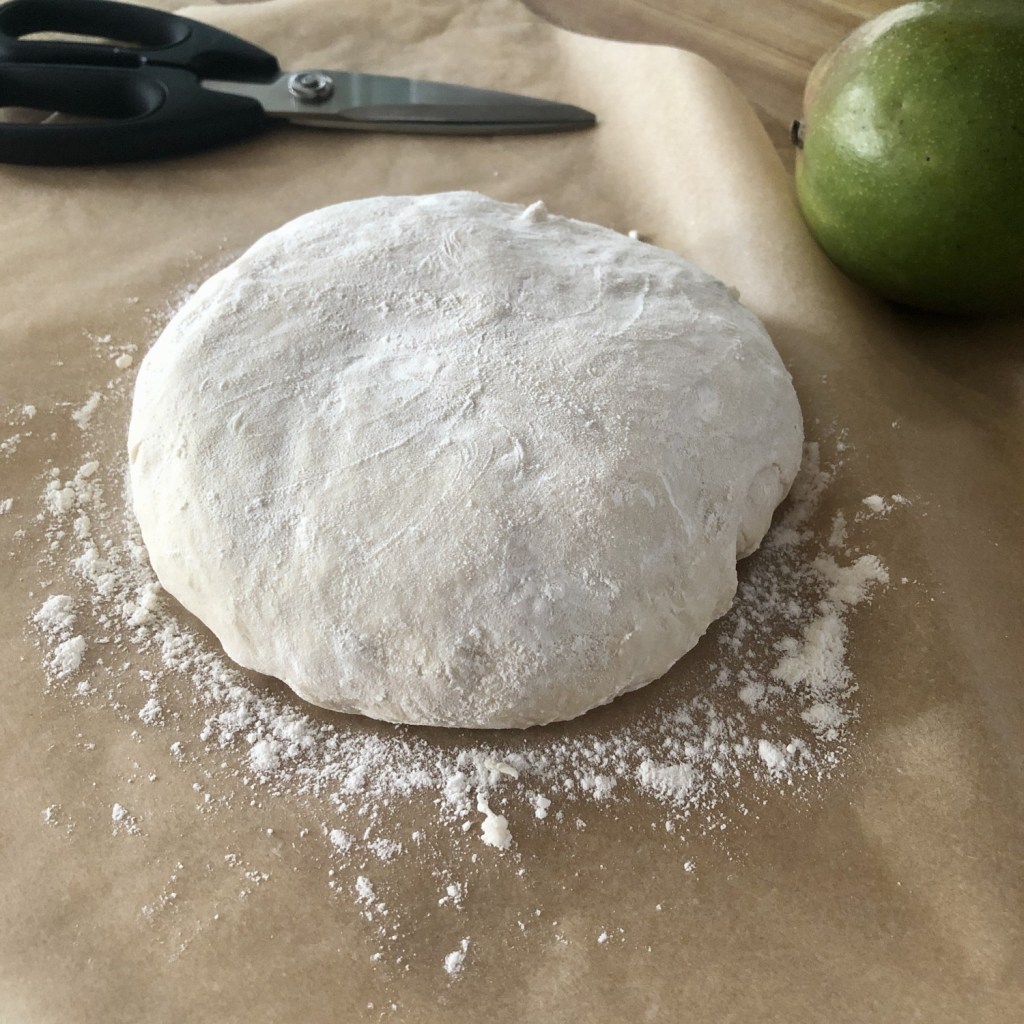
Let the dough rise at room temperature for 1 1/2 hours in an unheated oven with the light on. The dough should be on the parchment paper still, covered inside the dutch oven with its lid on. This provides the perfect warm environment for it to finish rising before it gets baked.
Remove the Dutch oven from the oven. Then remove the dough carefully from the dutch oven by lifting the corners of the parchment paper and setting it all aside to rest while the oven is preheating.
Preheat the oven to 450º F, placing the dutch oven alone, uncovered, for 30 minutes to preheat. While waiting, let the dough finish rising as the oven finishes heating.

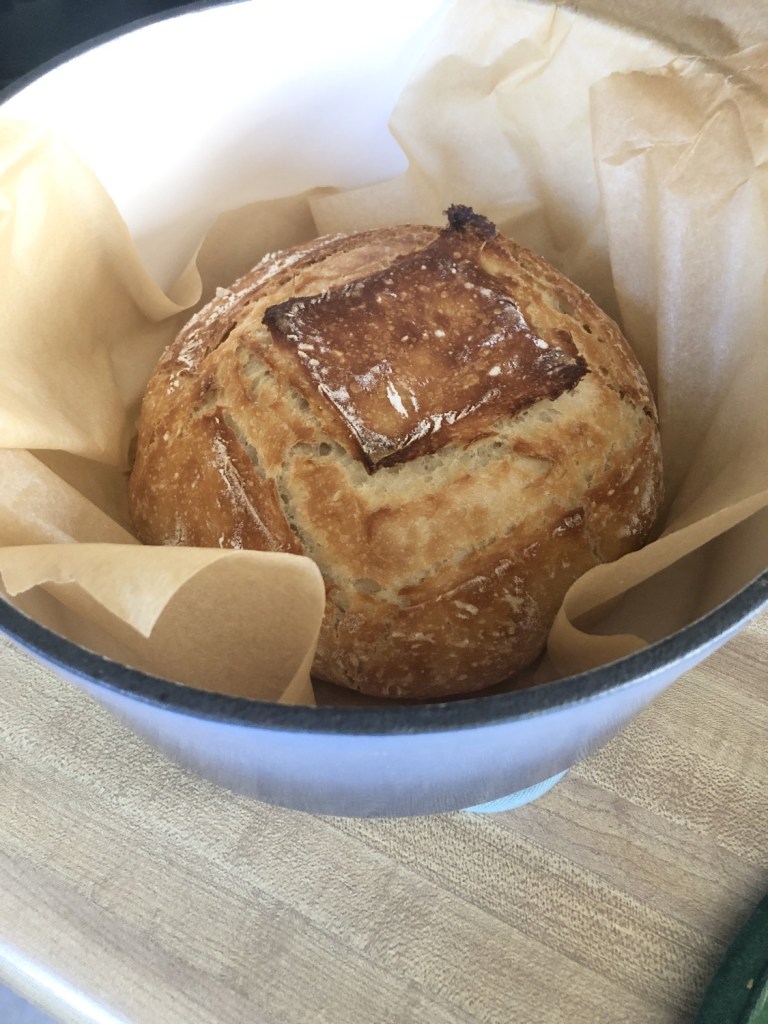
Make cuts in the dough with a lame, razor, or scissors. I made a traditional square in mine, but you can get fancier if you want.
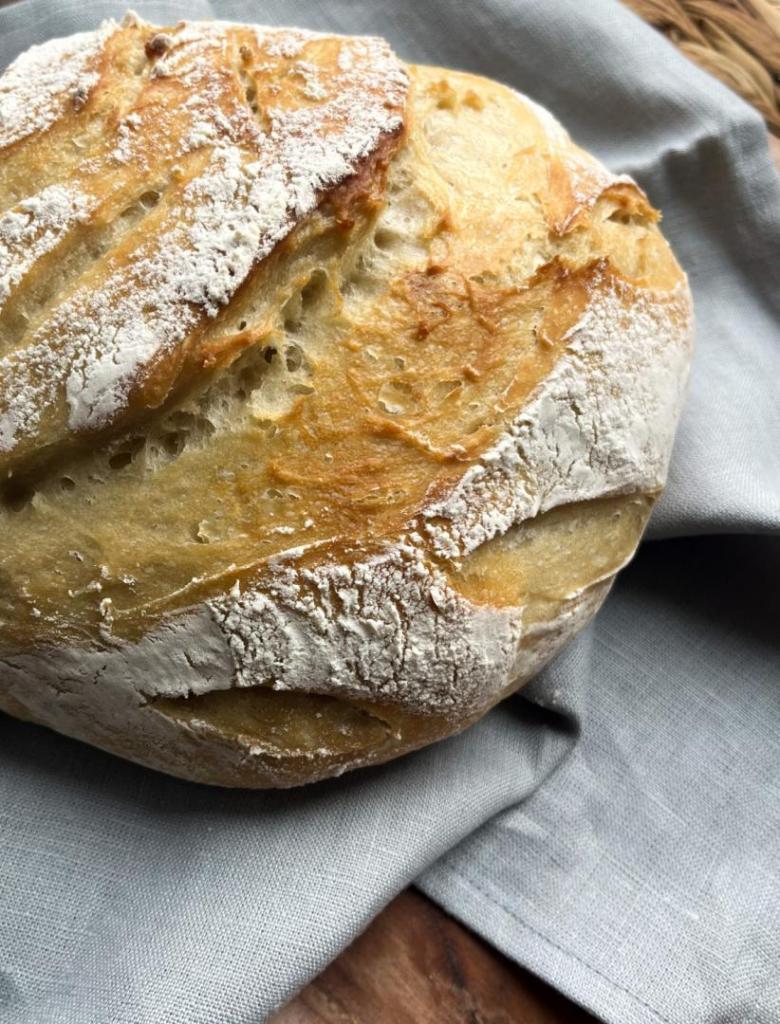
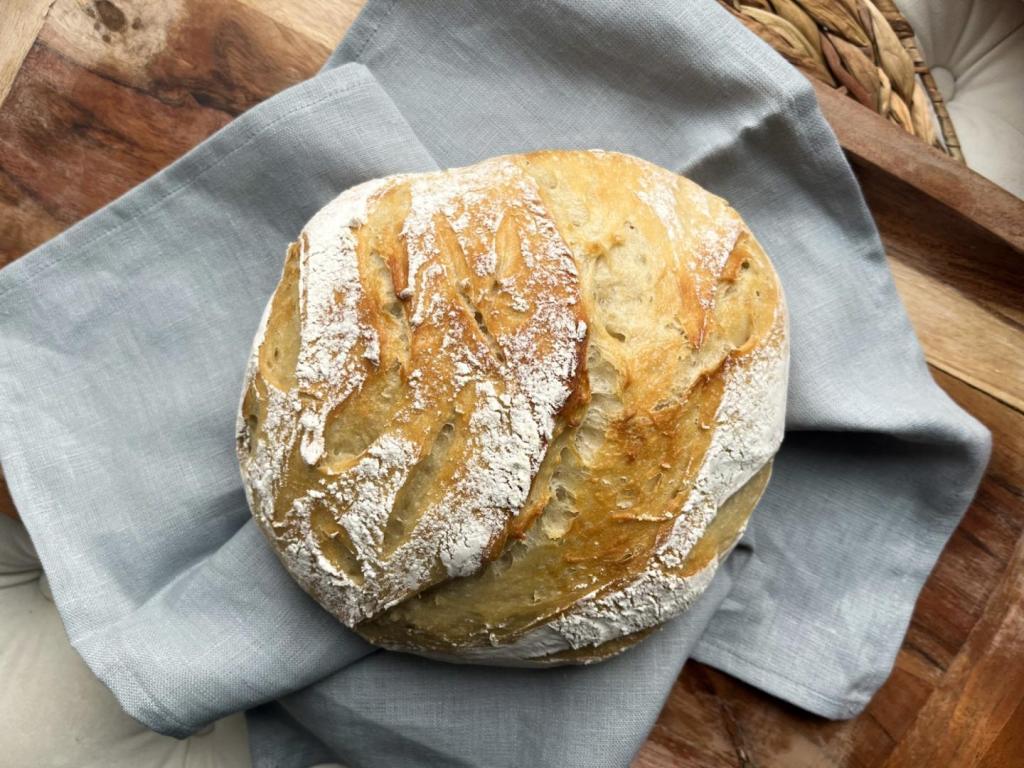
Place the dough inside the heated dutch oven carefully and bake covered for 30 minutes. Remove the lid and bake for another 15 minutes or so until the crust is browned. Once finished, cool on a cutting board for 20-30 minutes before slicing.
Tips for Easy Artisan Bread
Cool the bread a bit before slicing as the steam can be very hot and burn you. Also, because the bread will still be so hot it will continue to cook the inside for a bit longer and ensure it’s not too doughy. Let it rest during this time. It makes a difference.
When scoring, be sure to make quick, confident cuts. I still struggle with this advice, but the quicker you are the better the scores will be. Act as if you’ve been doing this for years–it makes a huge difference.
Let dough rise at room temperature inside an oven that has the light only turned on. The light provides just enough warmth for the dough to rise at the perfect temperature.
More Baking Inspiration
Easy Artisan Bread

Easy Artisan Bread is the crusty, chewy bread of your dreams. With minimal effort, this simple, classic bread is ready to be served alongside your favorite comfort dish.
- large dutch oven
- mixing bowl
- measuring cups and spoons
- parchment paper
- bread lame, razor, or scissors
- 3 cups white flour
- 2 tsp salt
- 1 tsp yeast
- 1 1/2 cups lukewarm water
Combine all the dry ingredients in a mixing bowl using a whisk.
Stir in lukewarm water with a wooden spoon or by hand, combining everything until a sticky dough forms.
Store the dough, covered, in the fridge overnight for 12-14 hours.
Remove dough from the refrigerator, placing onto a lightly floured surface. Sprinkle a little additional flour on the dough to make it easier to form into a ball. The dough may have some bubbles from fermenting–this is a good thing. It means the yeast is actively working.
Place the dough on parchment paper and let it rise at room temperature for 1 1/2 hours.
After 1 1/2 hours of the dough rising, preheat the oven to 450º F, placing the dutch oven alone uncovered for 30 minutes to preheat. While waiting, let the dough rise more as the oven finishes heating.
As the oven preheats, dust a bit more flour on the top of the dough. Make cuts in the dough with a lame, razor, or scissors. I made a traditional square in mine, but you can get fancier if you want.
Place the dough inside the preheated dutch oven, carefully, and bake covered for 30 minutes.
Remove the lid and bake for another 15 minutes or so until the crust is browned. Cool for 20-30 minutes on a cutting board before slicing.
Cool the bread a bit before slicing as the steam can be very hot and burn you. Also, because the bread will still be so hot it will continue to cook the inside for a bit longer and ensure it’s not too doughy. Let it rest during this time. It makes a difference.
When scoring, be sure to make quick, confident cuts. I still struggle with this advice–but the quicker you are, the better the scores will be. Act as if you’ve been doing this for years–it makes a huge difference.
Let dough rise at room temperature inside an oven that has the light only turned on. The light provides just enough warmth for the dough to rise at the perfect temperature.

7 thoughts on “Easy Artisan Bread”