Learn how to make a dried apple garland with cinnamon sticks for a fun way to celebrate and decorate your home this fall season.

This post may contain affiliate links. Please read our disclosure policy.
Can you believe that fall is here?! Well, almost anyway… I am not one to rush the seasons. In fact, I get a little irked when I start seeing Halloween decor out in July, Christmas stuff out in August, and so on and so forth.
Can’t we just enjoy the current season we’re in?
But I will say I understand that people like to plan in advance and get a headstart on ideas. So I really can’t blame them. My Pinterist board has been cluttered with fall stuff since mid-summer. (I’m highly suggestible when it comes to recipes, crafts, and decor.)
So this post is for all my planner ladies (and gentlemen) out there who just cannot wait for crisp, cool mornings, gardening chores to die down, cozy sweaters and boots, and talks of Halloween costumes and Thanksgiving Day recipes.
I do tend to get excited about decorating for the fall season, even though I like to keep it simple.
However, I tend to focus more on adding little gourds and pumpkins throughout my home during fall. All of which I like to buy real. This year I thought, “Why not try something new?”
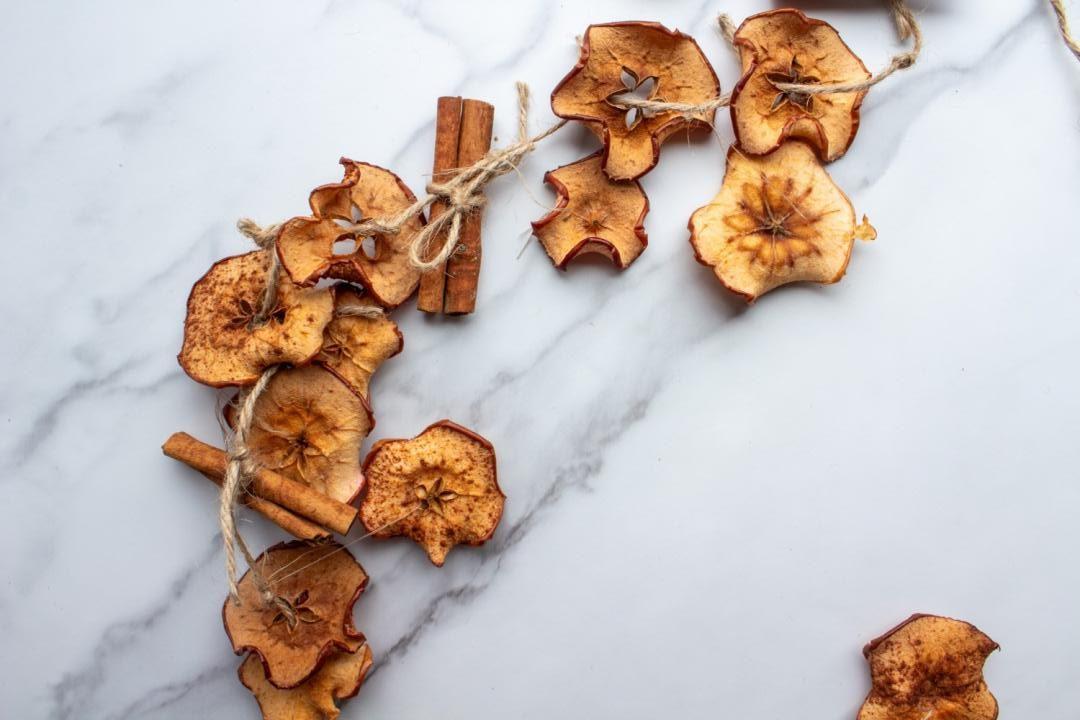
I’ve got a hankering for apples and decided I’d try my hand at crafting a dried apple garland with cinnamon sticks this year.
Doesn’t that sound both delicious and beautiful?
I do admit, when I was drying my apples for this project I kept a few for snacking on. So delicious! I’m hanging this over the floating shelves we made for our cottage kitchen. It smells lovely, looks both natural and beautiful, and is so simple to make.
Let me show you how I make it…

Dried Apple Garland with cinnamon sticks
Where should I hang my dried apple garland?
- Fireplace mantle
- Shelves
- Above a door/entryway
- Chandelier
- Countertops
- Along a table runner on a dinner table
Supplies | dried apple garland with cinnamon sticks
Twine or yarn, about a 6-8 ft piece
3 medium size apples, thinly sliced (about ⅛” thick)
Mandolin
Cutting board
Baking sheets
Parchment paper
Needle Thread
Scissors
Thumb tacks or nails

Tips for Success | dried apple garland with cinnamon sticks
Be sure to measure wherever it is you want to place your garland. After measuring, double this. A lot of the twine will “disappear” once you tie quite a few knots for securing the apples and cinnamon sticks to it. You need a lot more than you realize.
Although it’s always better to have more than not enough twine, consider tying and joining more twine to your garland if it happens to run too short. You are welcome to make several smaller garlands and tie them together if needed.
Tie knots on both sides of the dried apples/cinnamon sticks as you secure them to the twine. This will keep them from slipping out of place.
Dry the apples low and slow. That is the best advice I can give on drying them. Every oven is different, so keep an eye on them every so often as they bake and dry out. Always allow plenty of drying time. If you cook them too high you will just end up with darker apples.

Steps | dried apple garland with cinnamon sticks
1. Start by measuring and cutting the twine/yarn to the desired length.
2. Preheat oven to 200ºF.
3. Line three baking sheets with parchment paper.
4. Slice apples ⅛” thick using a mandolin. Remove seeds but leave the core.
5. Arrange in a single layer, not overlapping, on the parchment paper.
6. Bake apples for 2-3 hours, checking every 30-60 minutes. Edges will begin to curl in and the apples will feel hard and dry to the touch when they’re done.
7. Set apple slices aside to cool.
8. Separate the slices of apples that need a hole in them (some may have holes already from where seeds were). Use a needle to poke a hole and thread some thread (about a 3-4″ piece) through the apples that need a hole in them. Tie the thread off, making a knot. This should now look like an apple ornament. You’ll tie this to the twine garland later.
9. You may wish to bundle 2 cinnamon sticks together with twine. Wrap twine around to secure them together in a simple bow or knot.
10. Thread the twine through the dried apples and cinnamon sticks, alternating between the two as desired. I prefer starting in the center and working my way outward.
I recommend using an every third (2:1 ratio) or an every fourth pattern (3:1 ratio) for apples and cinnamon sticks. For example, an every third pattern will look like: apple, apple, cinnamon sticks, apple, apple, cinnamon sticks…
11. Once you reach the end, secure ends with a knot.
12. Hang where you please, using thumb tacks or nails to secure into place.


More Fall Fun Inspiration
10 Things to Declutter this Fall

One thought on “Dried Apple Garland with cinnamon sticks”