Watch Antique Gold Rub ‘n Buff transform an old metal picture frame with just a few easy steps. The result creates timeless beauty for any room that needs a little makeover. Such an easy DIY that completely changes the decorating game for all vintage lovers.

This post may contain affiliate links. Please read our disclosure policy.
Oh, man. I have been dying to tackle some small crafty projects around the home involving decor. I’ve been holding onto an old oval picture frame for some time now. Now that I’m getting around to fully decorating the master bedroom, I knew this picture frame would be so fun (and quick!) to makeover.
Plus, I’m stoked that I purchased another Miss Mustard Seed art print to fit inside the old frame. I just love her art and decorating style. It’s old-world traditional meets modern day European country. I just adore it.
And don’t get me started on this Rub ‘n Buff I just acquired… I’ve been so ready to experiment with it.

Honestly, I don’t know what we would all do without Antique Gold Rub ‘n Buff. (Or any Rub ‘n Buff for that matter.)
Once applied it creates this gorgeous, authentic antique look.
The picture frame I used was originally a fake, cheap gold color that just didn’t quite do the art print justice. I knew it needed a special little touch. The Rub ‘n Buff really made a difference.
There are so many ways to use this product, but art and picture frames are definitely popular. It has a way of making pieces look more original.

I knew it would be worth taking the time to use Antique Gold Rub ‘n Buff on this old frame because it was unique. Being an oval frame with details around the edges, which is often lacking in modern-day frames, it was worth putting a few minutes of time into making over. It just needed some touching up to bring it back to life.
Now that I’ve transformed it, it suits the art and the bedroom so much more. It holds so much charisma and personality.
Come see how I completed this DIY picture frame makeover using Antique Gold Rub ‘n Buff.
DIY Aged Picture Frame | Antique Gold Rub ‘n Buff
Can Rub ‘n Buff be used in conjunction with another paint?
Absolutely. In fact, most people seem to paint old frames with a solid color first before applying Rub ‘n Buff to it. At least when trying to create an aged look.
Adding a solid color first can create a wonderful contrast or add a subtle background to the hints of antique gold added in. This is what truly gives it the antique style.

Supplies
Paint brushes (varying sizes are helpful)
Rags
Old picture frame
Paint of choice (spray, acrylic, chalk, or latex are popular)
Antique Gold Rub ‘n Buff I used this HERE (or another color of your choice)
Paper plate or scrap piece of cardboard
Newspaper

Steps for using Rub ‘n Buff
Clean
Wipe the picture frame down using an old rag. If you need a cleaning agent, use a 1:1 ratio of vinegar-water. Be certain it is free from dust and dirt before you begin working. You don’t want any of this sticking in the paint. Then lay down newspaper, so you don’t get any paint on your table.

Disassemble frame
You will need to take the picture frame apart at this point to make it easier to paint. Remove the backing and the glass, so you have just the frame to work with. Some frames like the one I was working with may require you to use a screwdriver to take screws out. Just be sure to save these for later when you reassemble it.

Paint
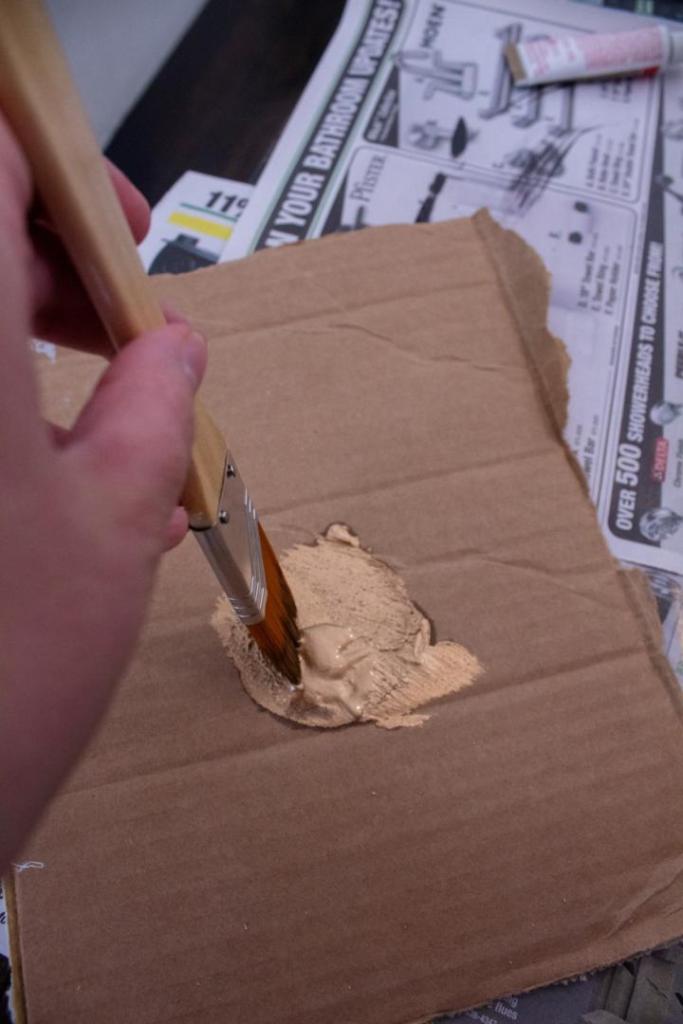
Using one of your larger paint brushes, begin applying a thin layer of your base paint in even strokes. I recommend buying a dark brown paint that looks really nice behind the Antique Gold Rub ‘n Buff. If your frame is already a dark color, think about whether it needs to be touched up at all before adding the Rub ‘n Buff over it.


After applying the paint all over, let the frame dry for at least an hour, or until it is dry to the touch.
Rub ‘n Buff
Begin adding the Antique Gold Rub ‘n Buff now. Start by adding a few drops to a paper plate or scrap piece of cardboard. Begin dabbing your brush or cloth tip with just a little at a time. Use a paint brush or rag to lightly apply it in a thin layer, using even strokes all over.
However, be careful to leave some areas untouched with paint as you make long strokes and rub it all over. A little bit goes a long way. Whether using a brush or a cloth rag, you should go over it more even when the brush seems dry. This helps buff it out. It also helps create streaks of dark paint just barely visible underneath the antique gold.
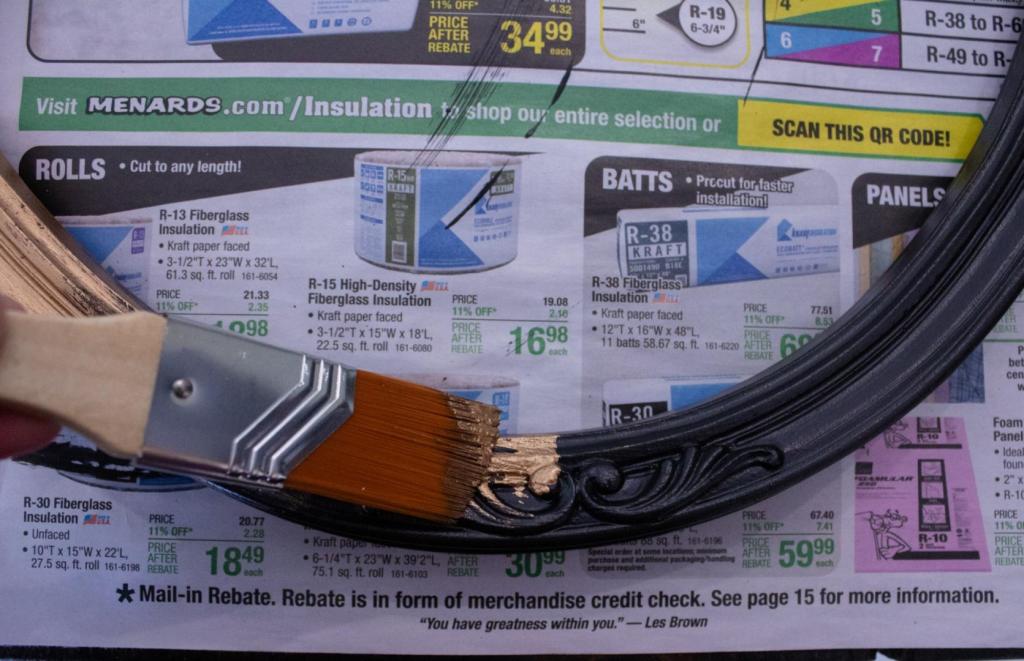
For example, I left some of the details on the frame without Rub ‘n Buff. I applied and rubbed in some, but also left some tiny bare spots for an aged style. You may choose to leave some corners and edges with less, too, for the desired effect. This allows the background color to show through for an original look. I do recommend using a smaller brush for corners and the smaller details. Once finished, let it dry for an hour or so, until it’s dry to the touch.

Reassemble
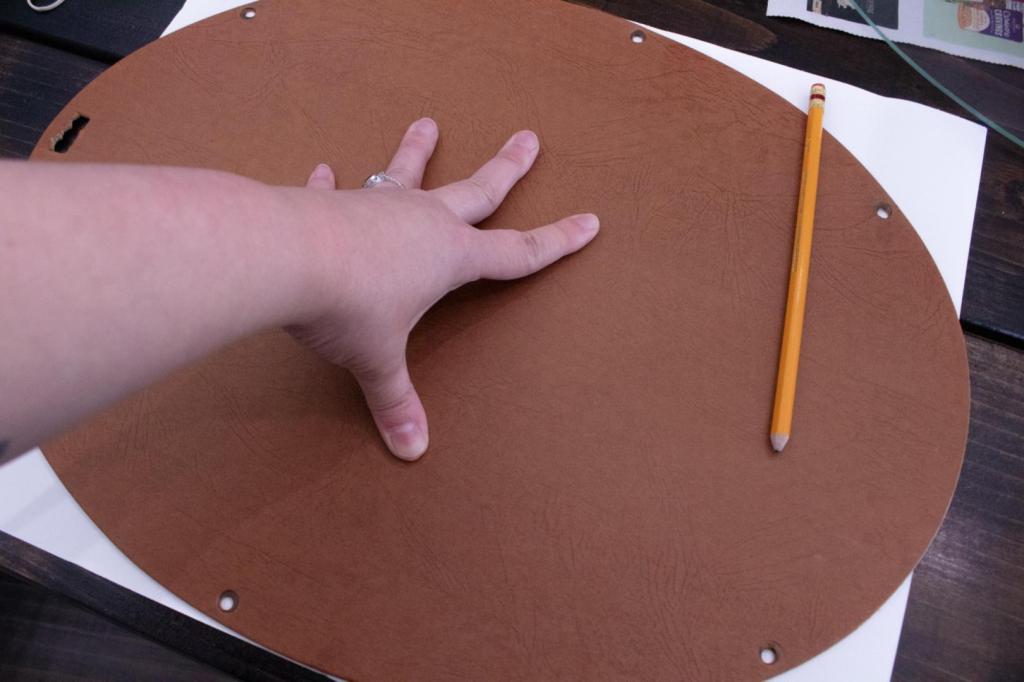
Reassemble the picture frame and add vintage-style art or a photo you love. If you have an odd-shaped frame or an oversized print, you may need to trim your artwork/photo down to fit the frame. This can be done by tracing the picture frame backing/insert over the back side of the artwork. Then trim it down using scissors.


Tips for using Rub ‘n Buff
Try using a larger paint brush or rag for applying the Rub ‘n Buff initially. Then once you have only corners, crevices, and more ornate areas left, switch to using a smaller paint brush. These are great for using in hard to reach places.
Apply the Rub ‘n Buff lightly. Really, a little goes a very long way. I used just a few small drops total on this entire frame. It is thin and will spread far. That’s why it’s important to keep spreading it by “rubbing” and “buffing” it out.
For even more experimentation, try using a combination of different Rub ‘n Buff colors. Layer them to create an aged piece with more depth and variety. Apply each color, one by one, letting it dry before applying the next.

More DIY Inspiration
Easy Thanksgiving Tablescape Ideas
Scandinavian Christmas Tree Decorating
DIY Dresser Makeover | Marble Top with Tiles

4 thoughts on “DIY Antique Gold Rub ‘n Buff Aged Picture Frame”